When we bought the Acorn Hill Home we knew it needed a lot of work. In fact, someone had actually bought it before us and backed out during inspections because they didn’t realize exactly how much work was going to be needed. This is the first post in a series of posts where I detail the renovation room by room. We are starting with the Kitchen Renovation!
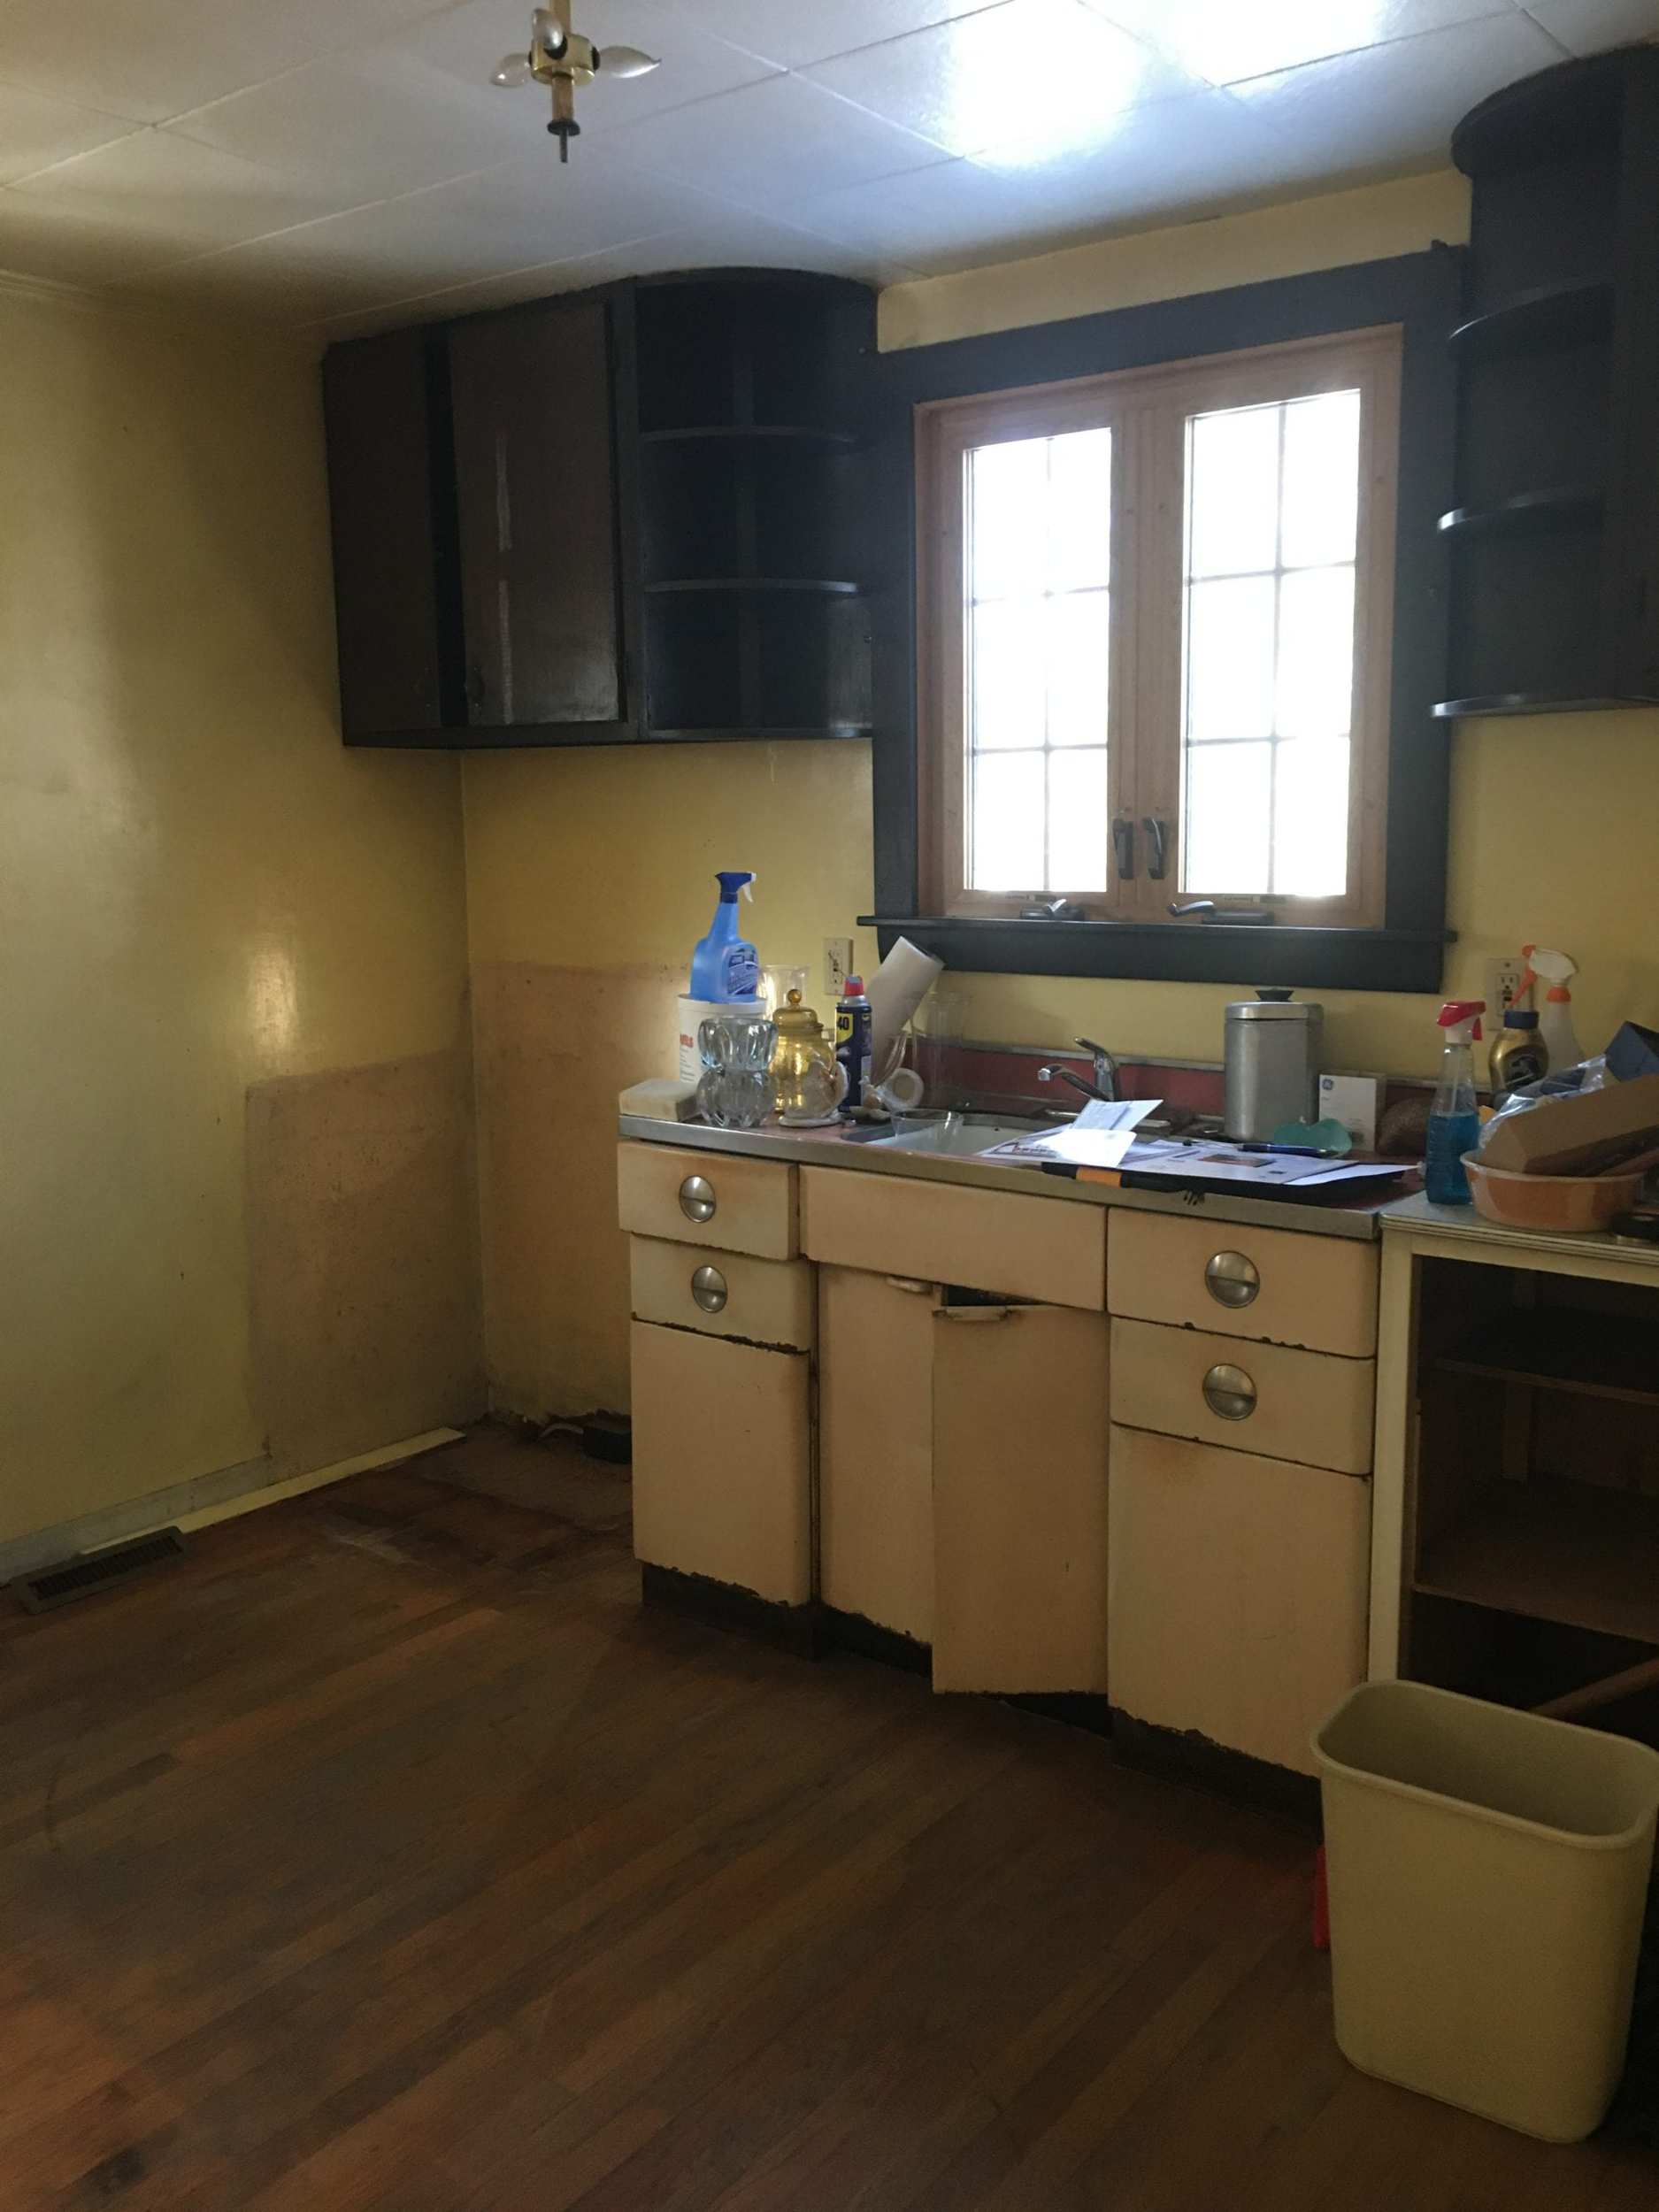
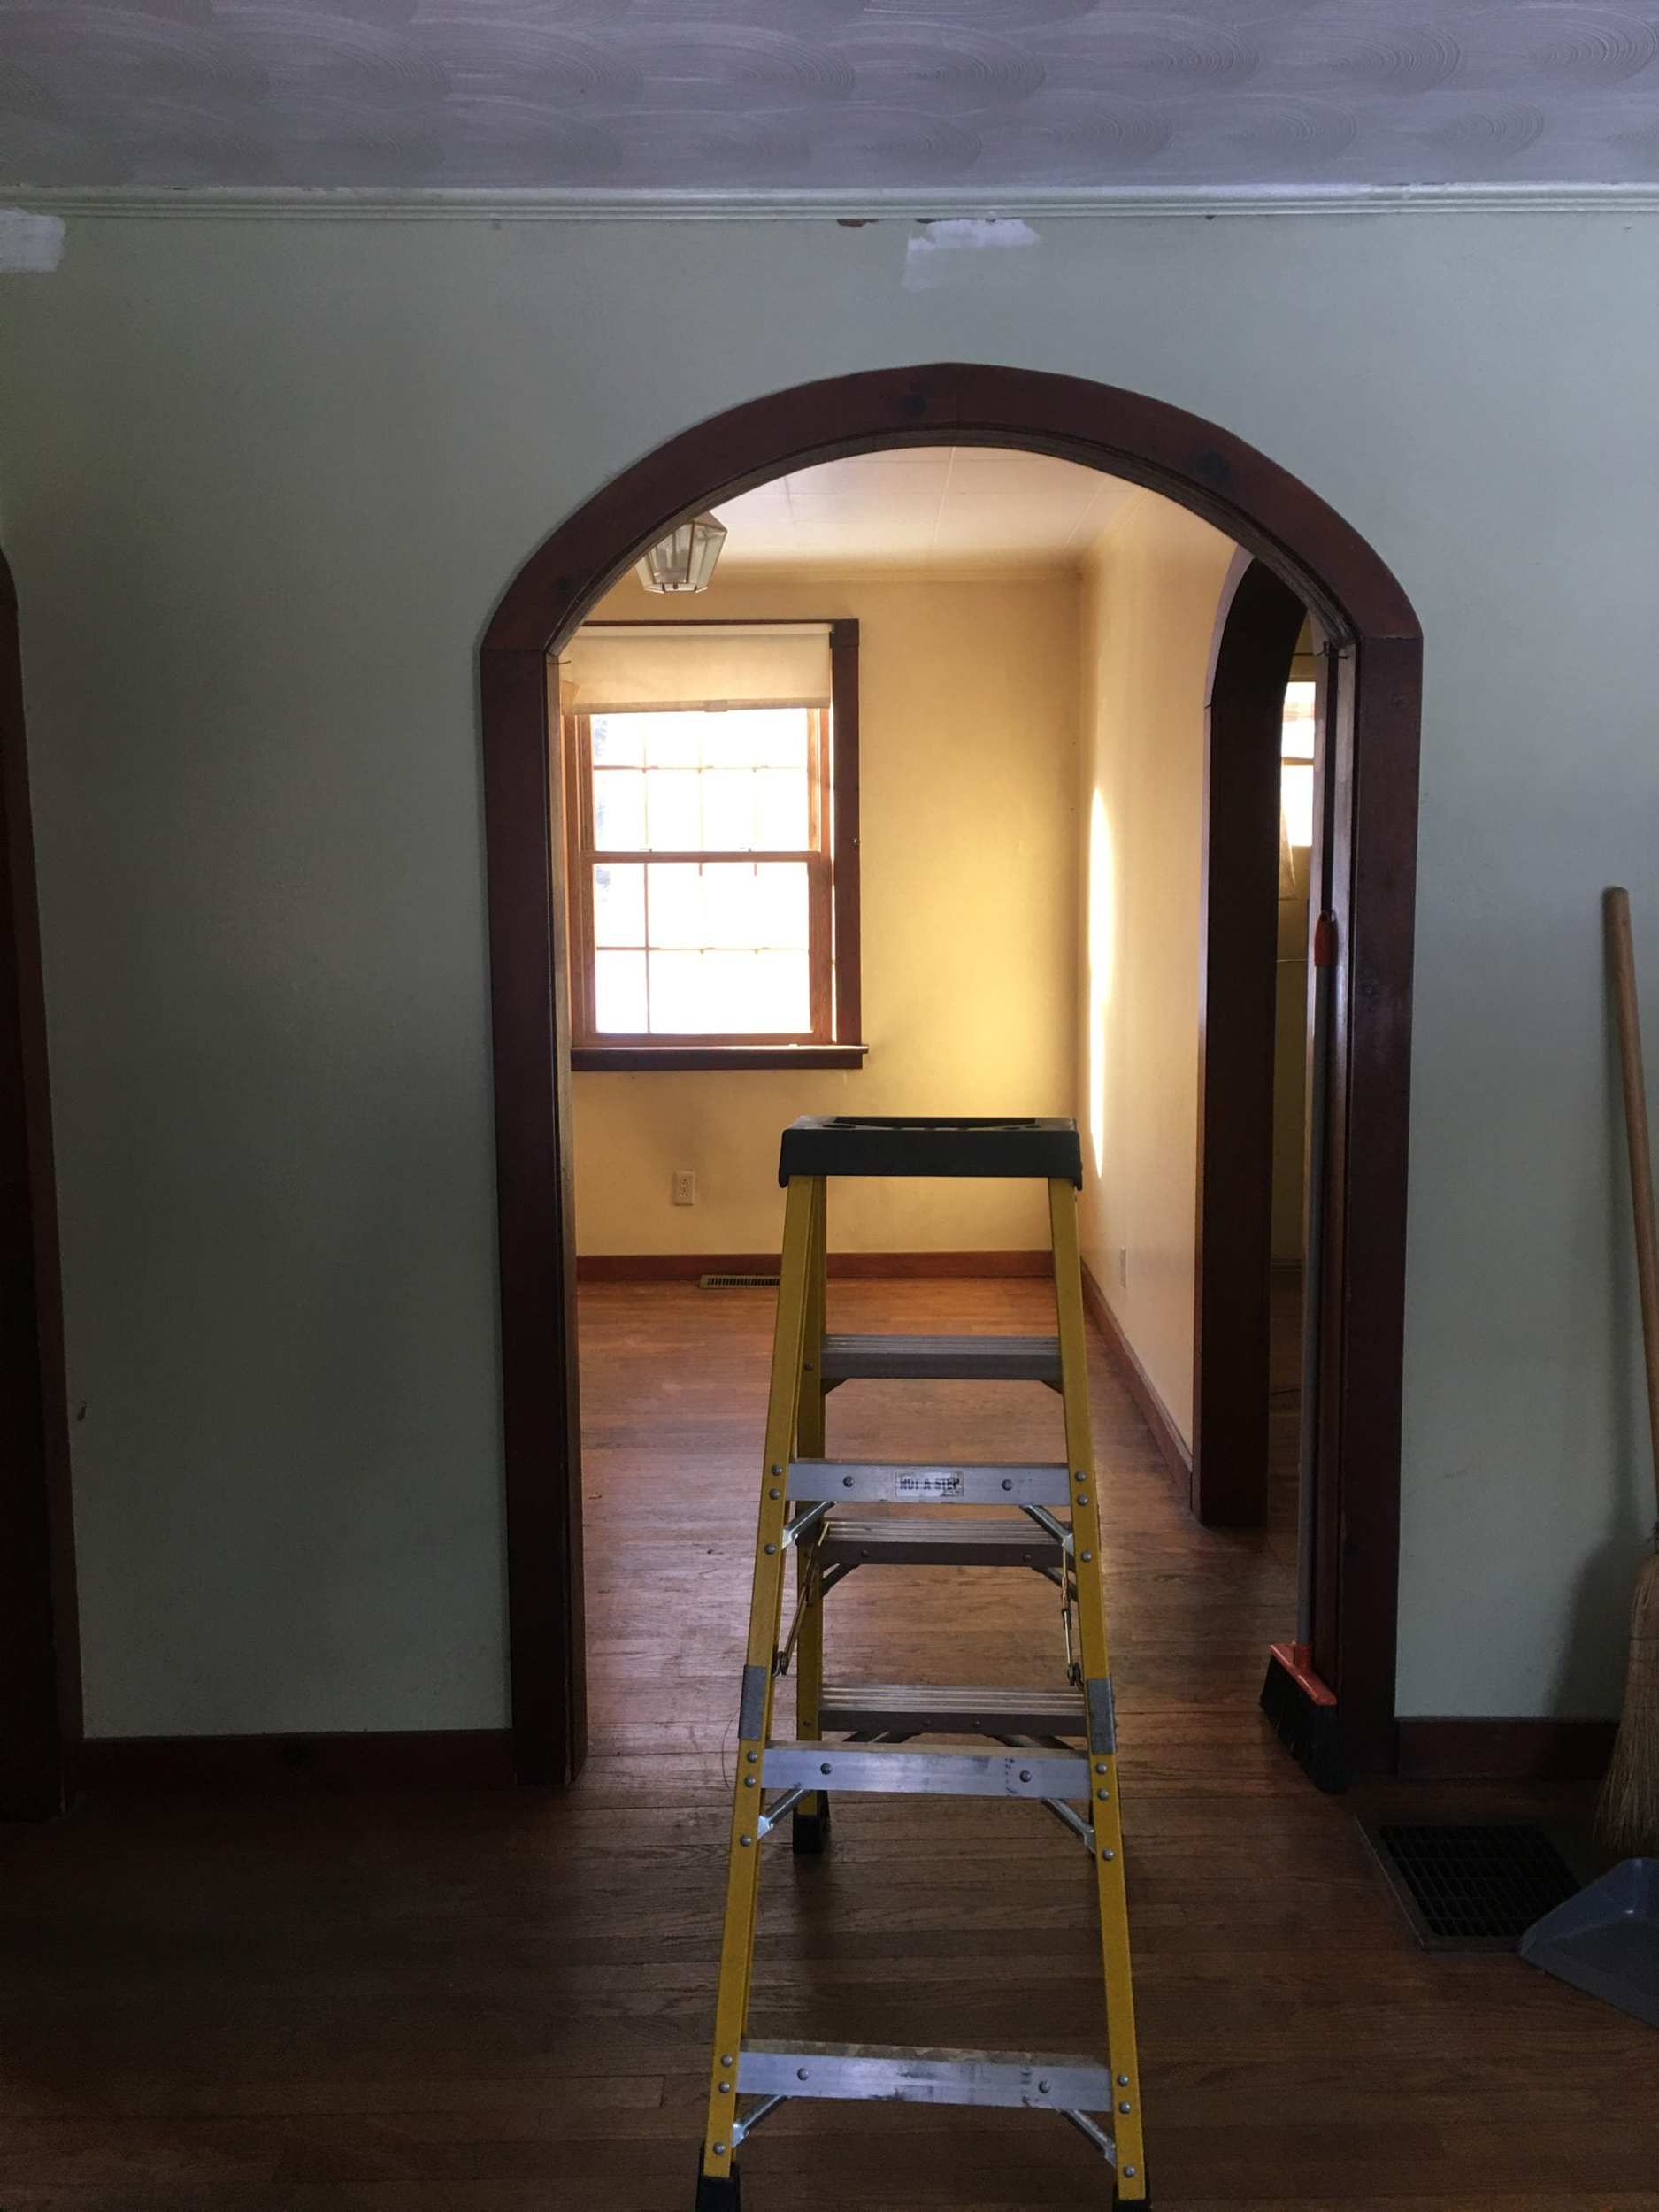
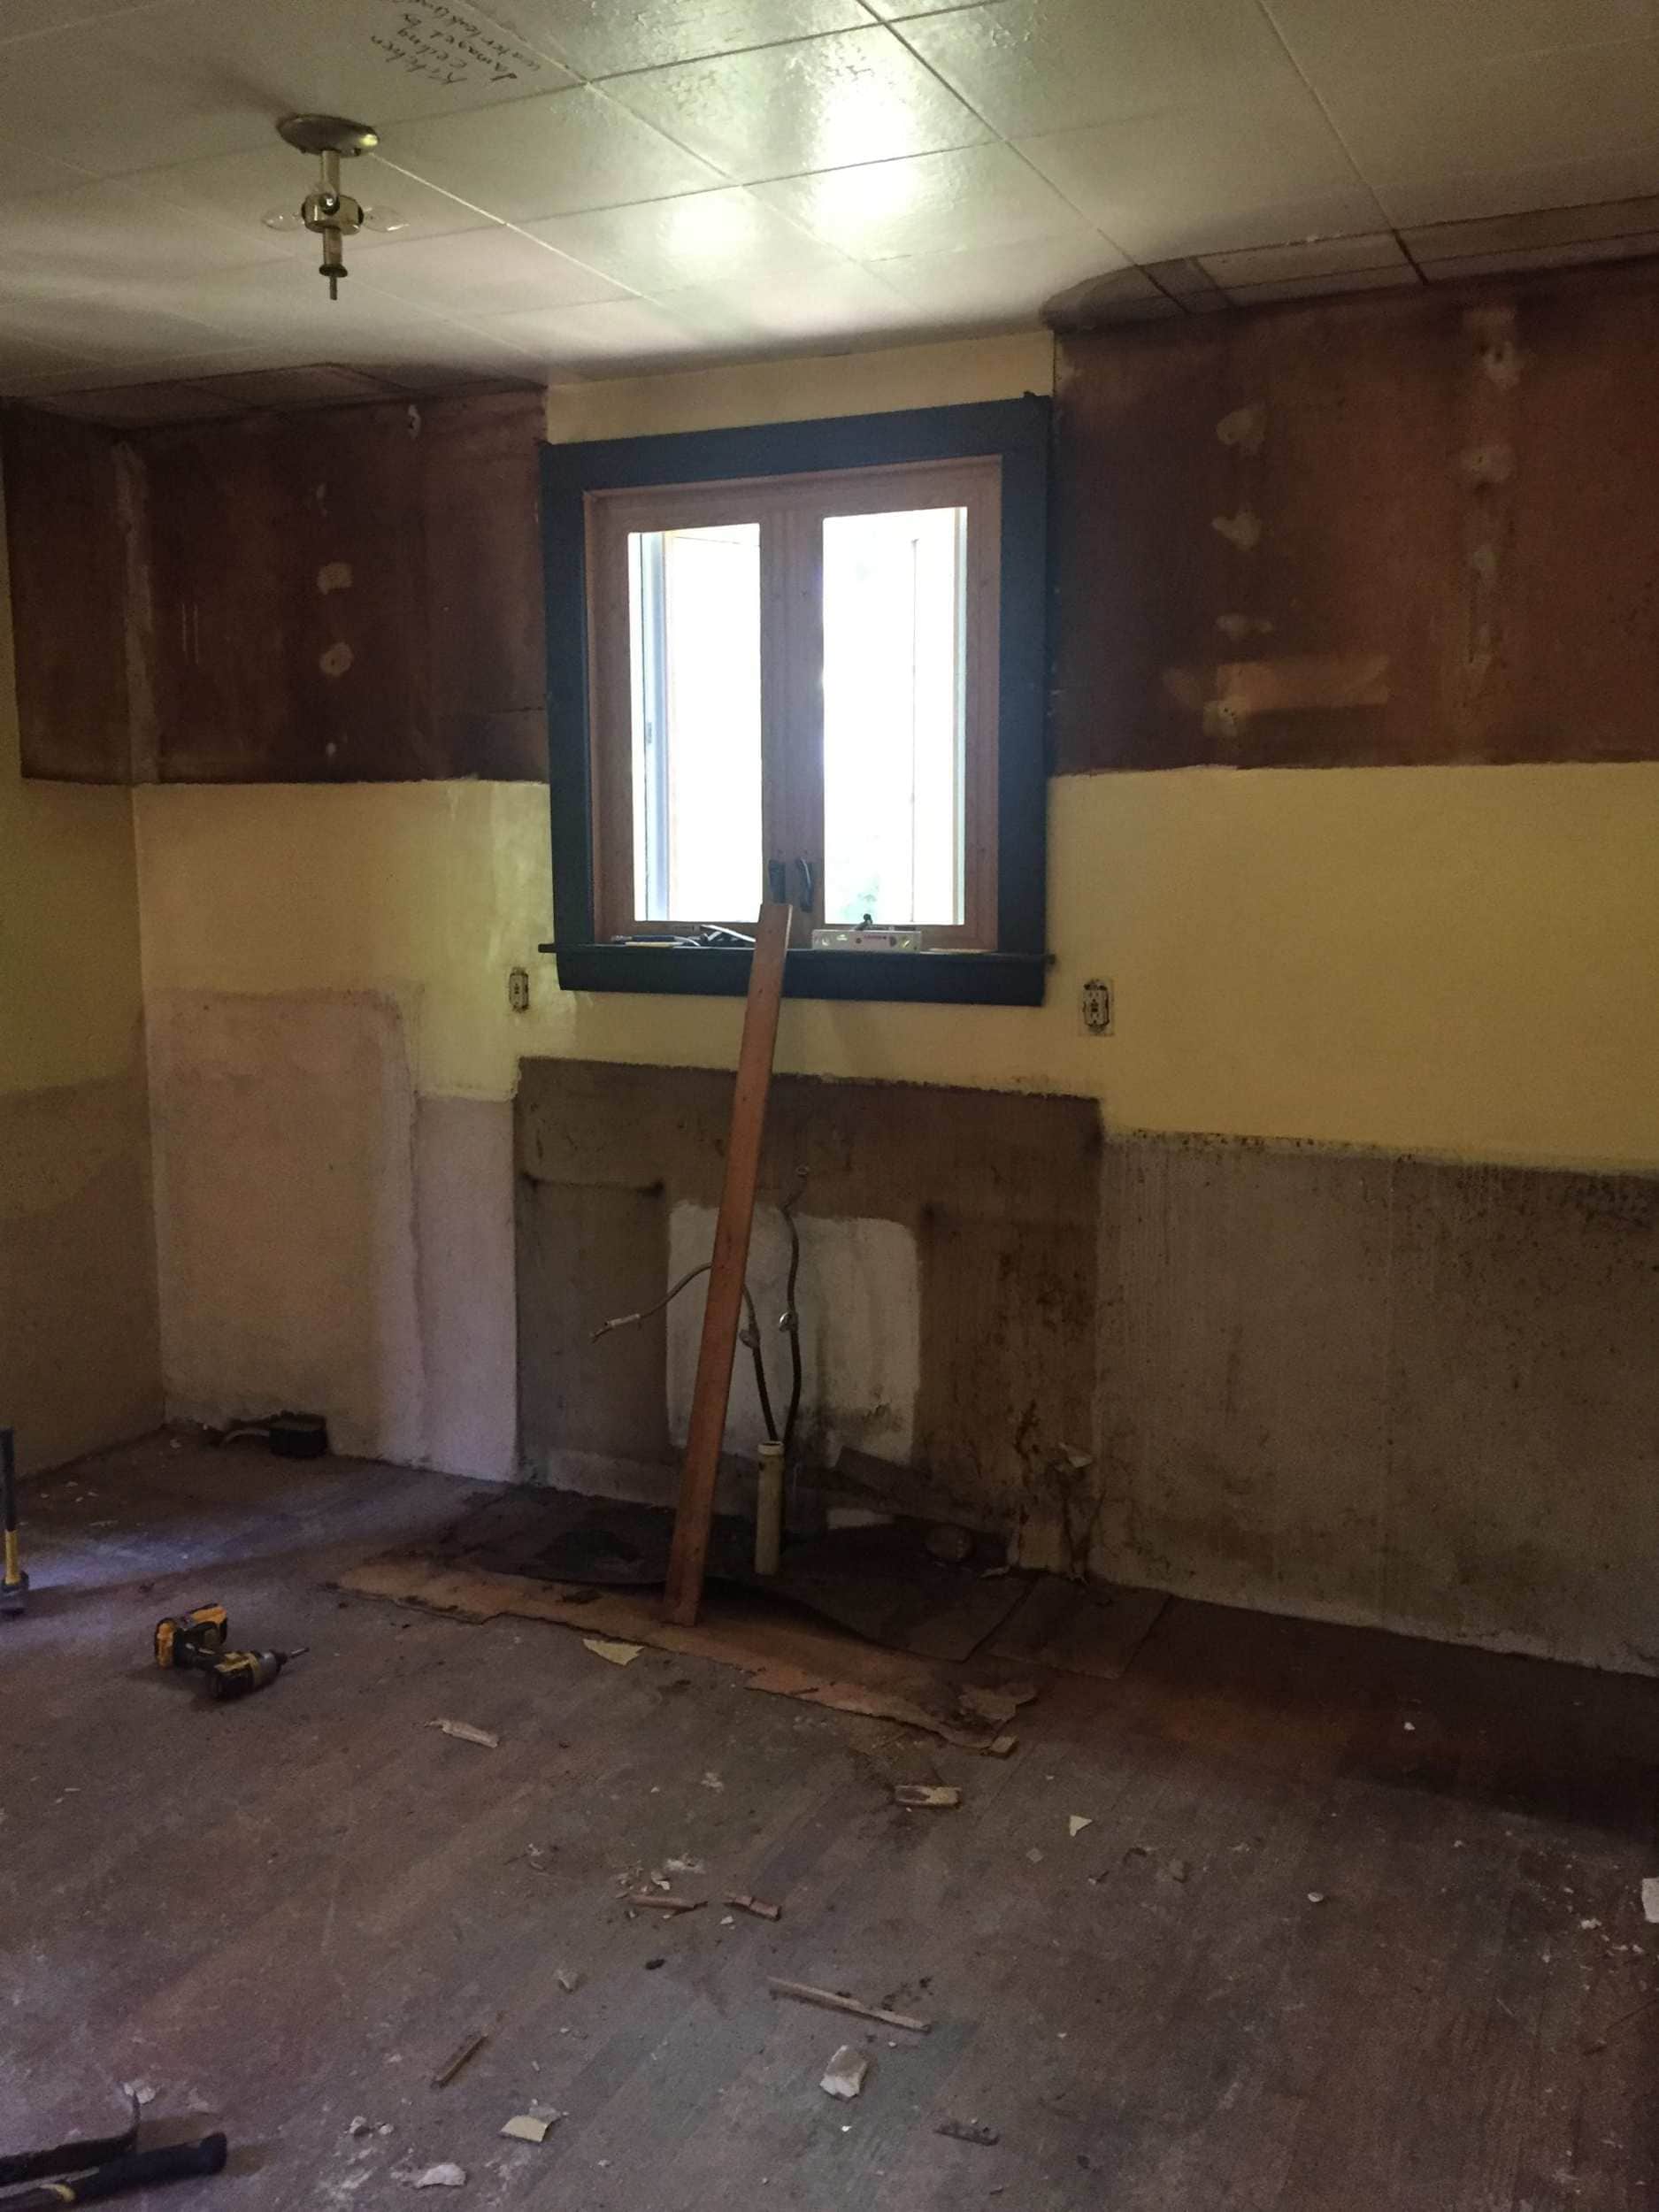
We knew the whole thing needed to be gutted. Period. I know what you are thinking after seeing these pictures…how on earth do you live there and also how on earth did you see a vision for this house?! The cabinets were in shambles, there were scorch marks on the drywall from the oven, and the kitchen space was so small. The first thing we did for this kitchen renovation was tear down the wall between the dining room and kitchen opening up the space. This made such a major difference! My contractor originally just wanted to patch the sheetrock, but as you can see from the pictures there was some mold. There was no AC or proper ventilation in the home previously. We essentially ripped everything out, tore down the wall, tore off the sheetrock, and started from scratch.

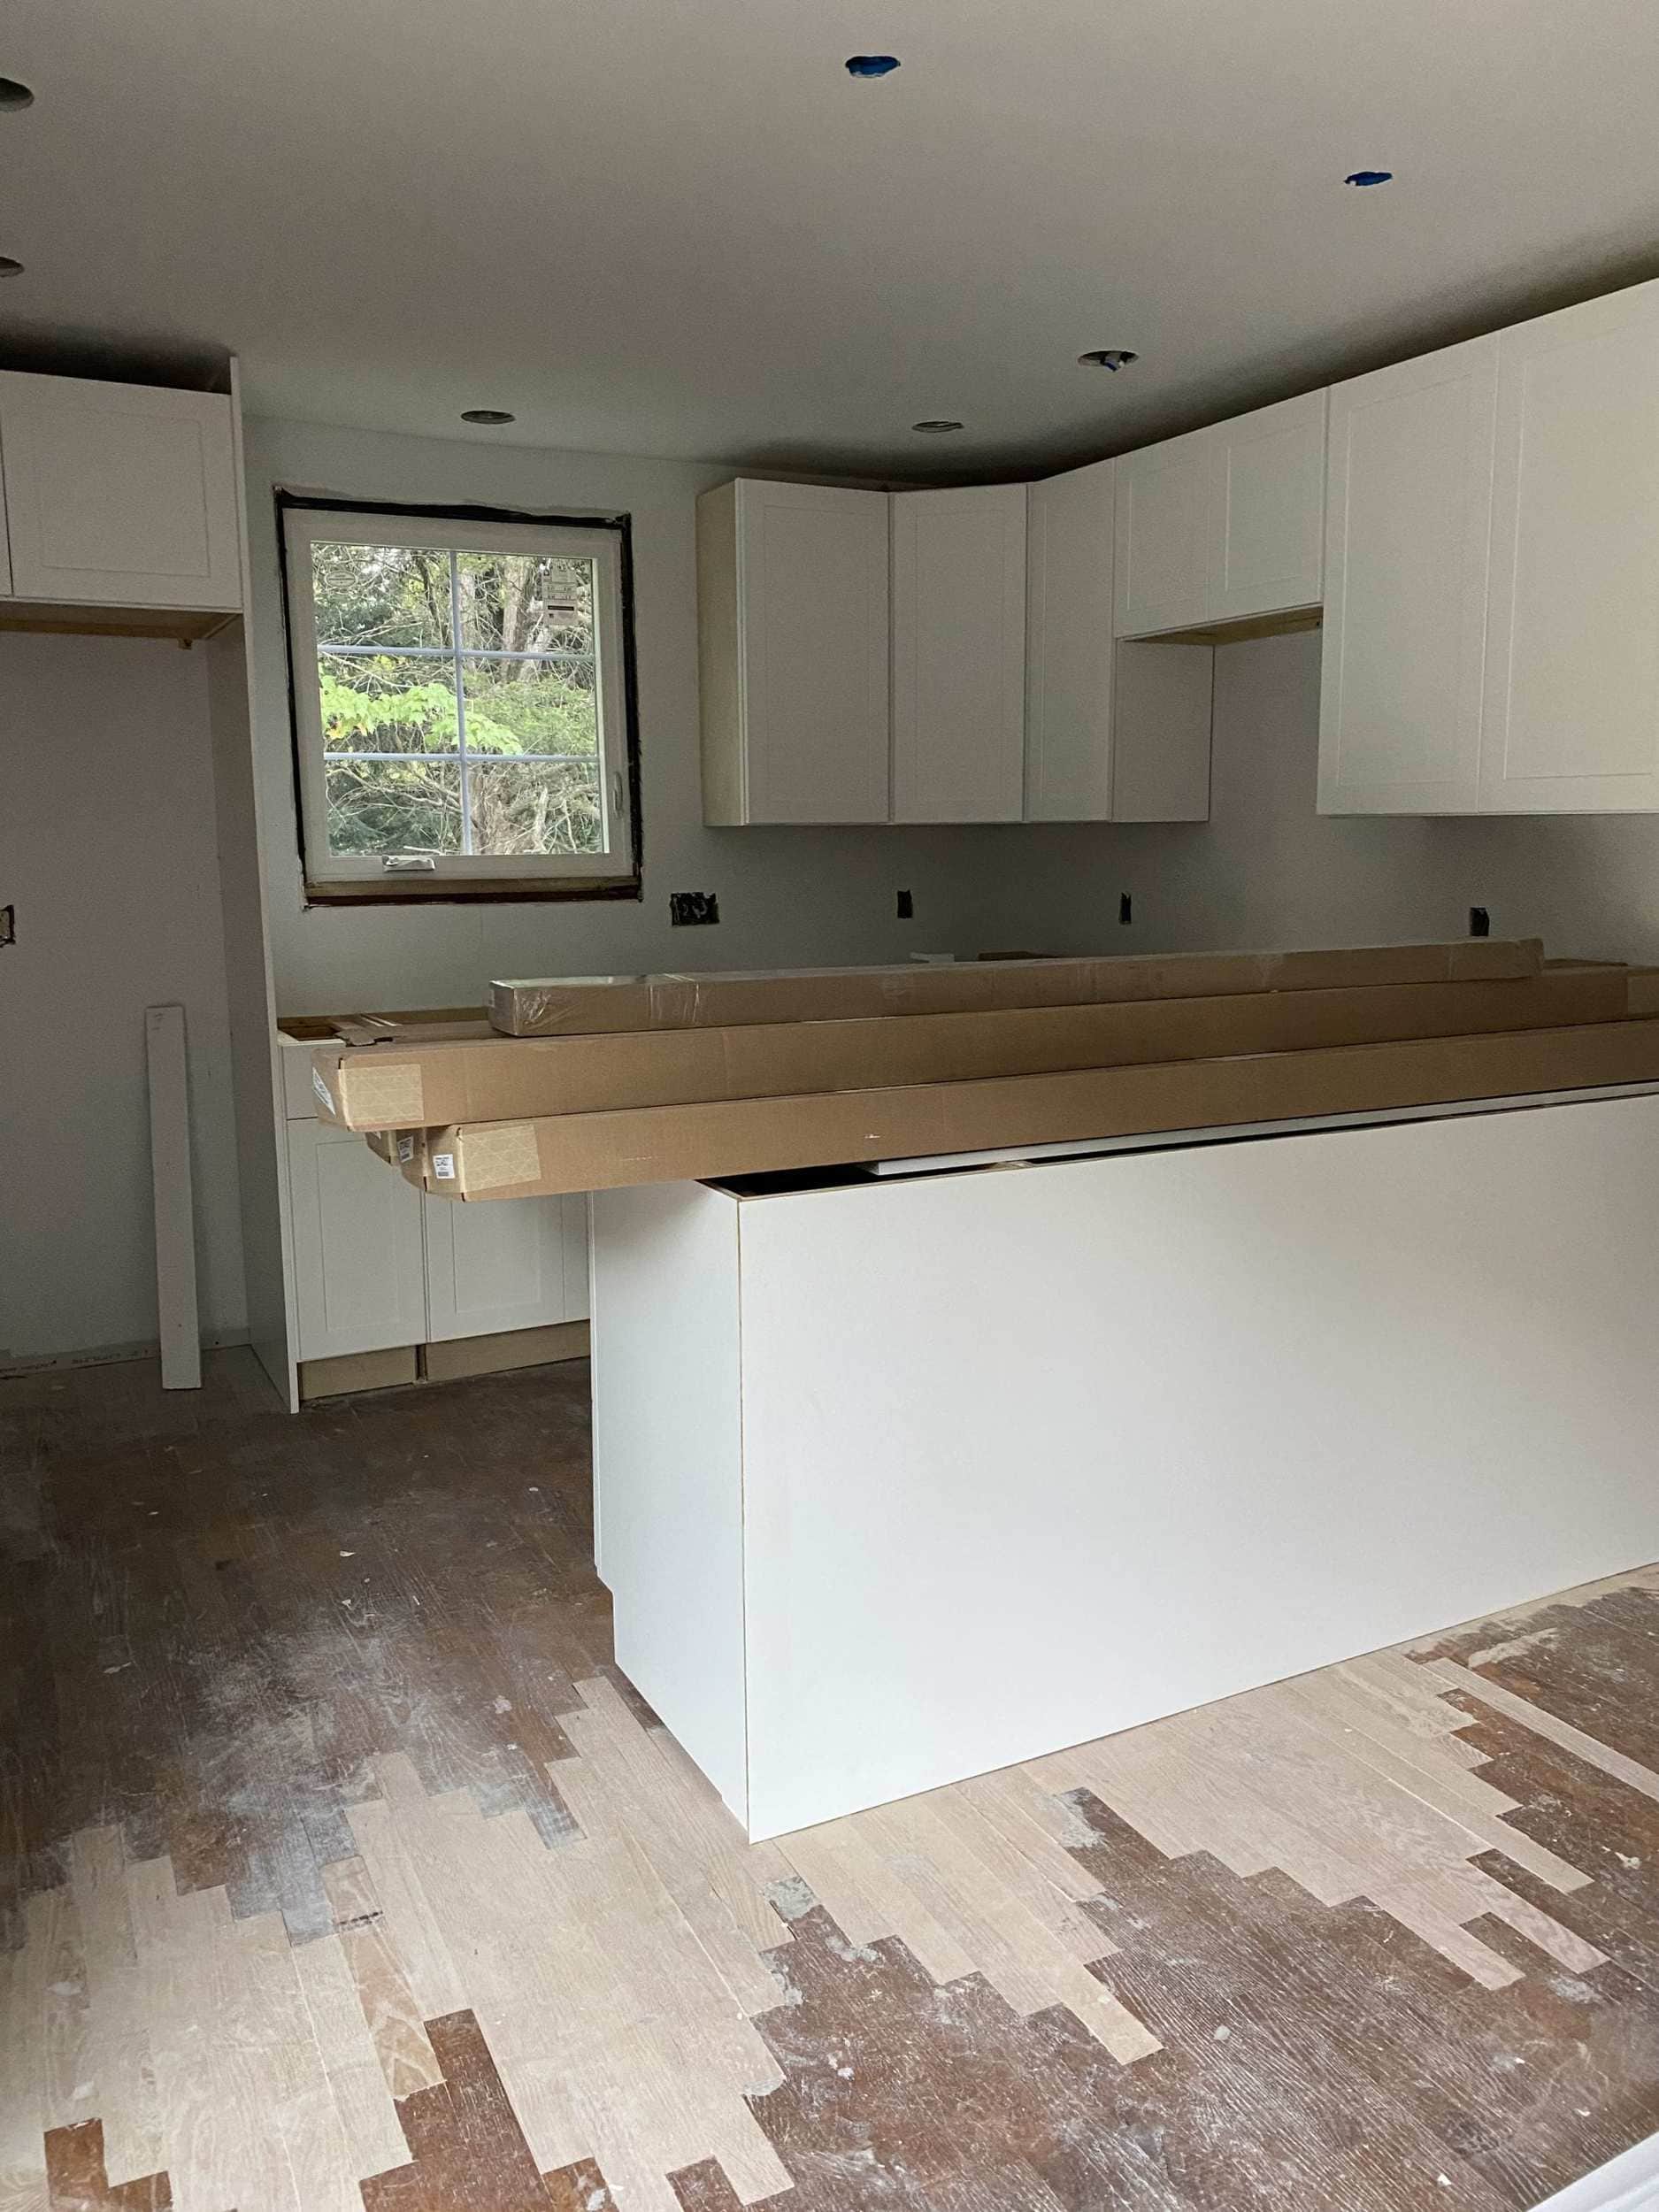
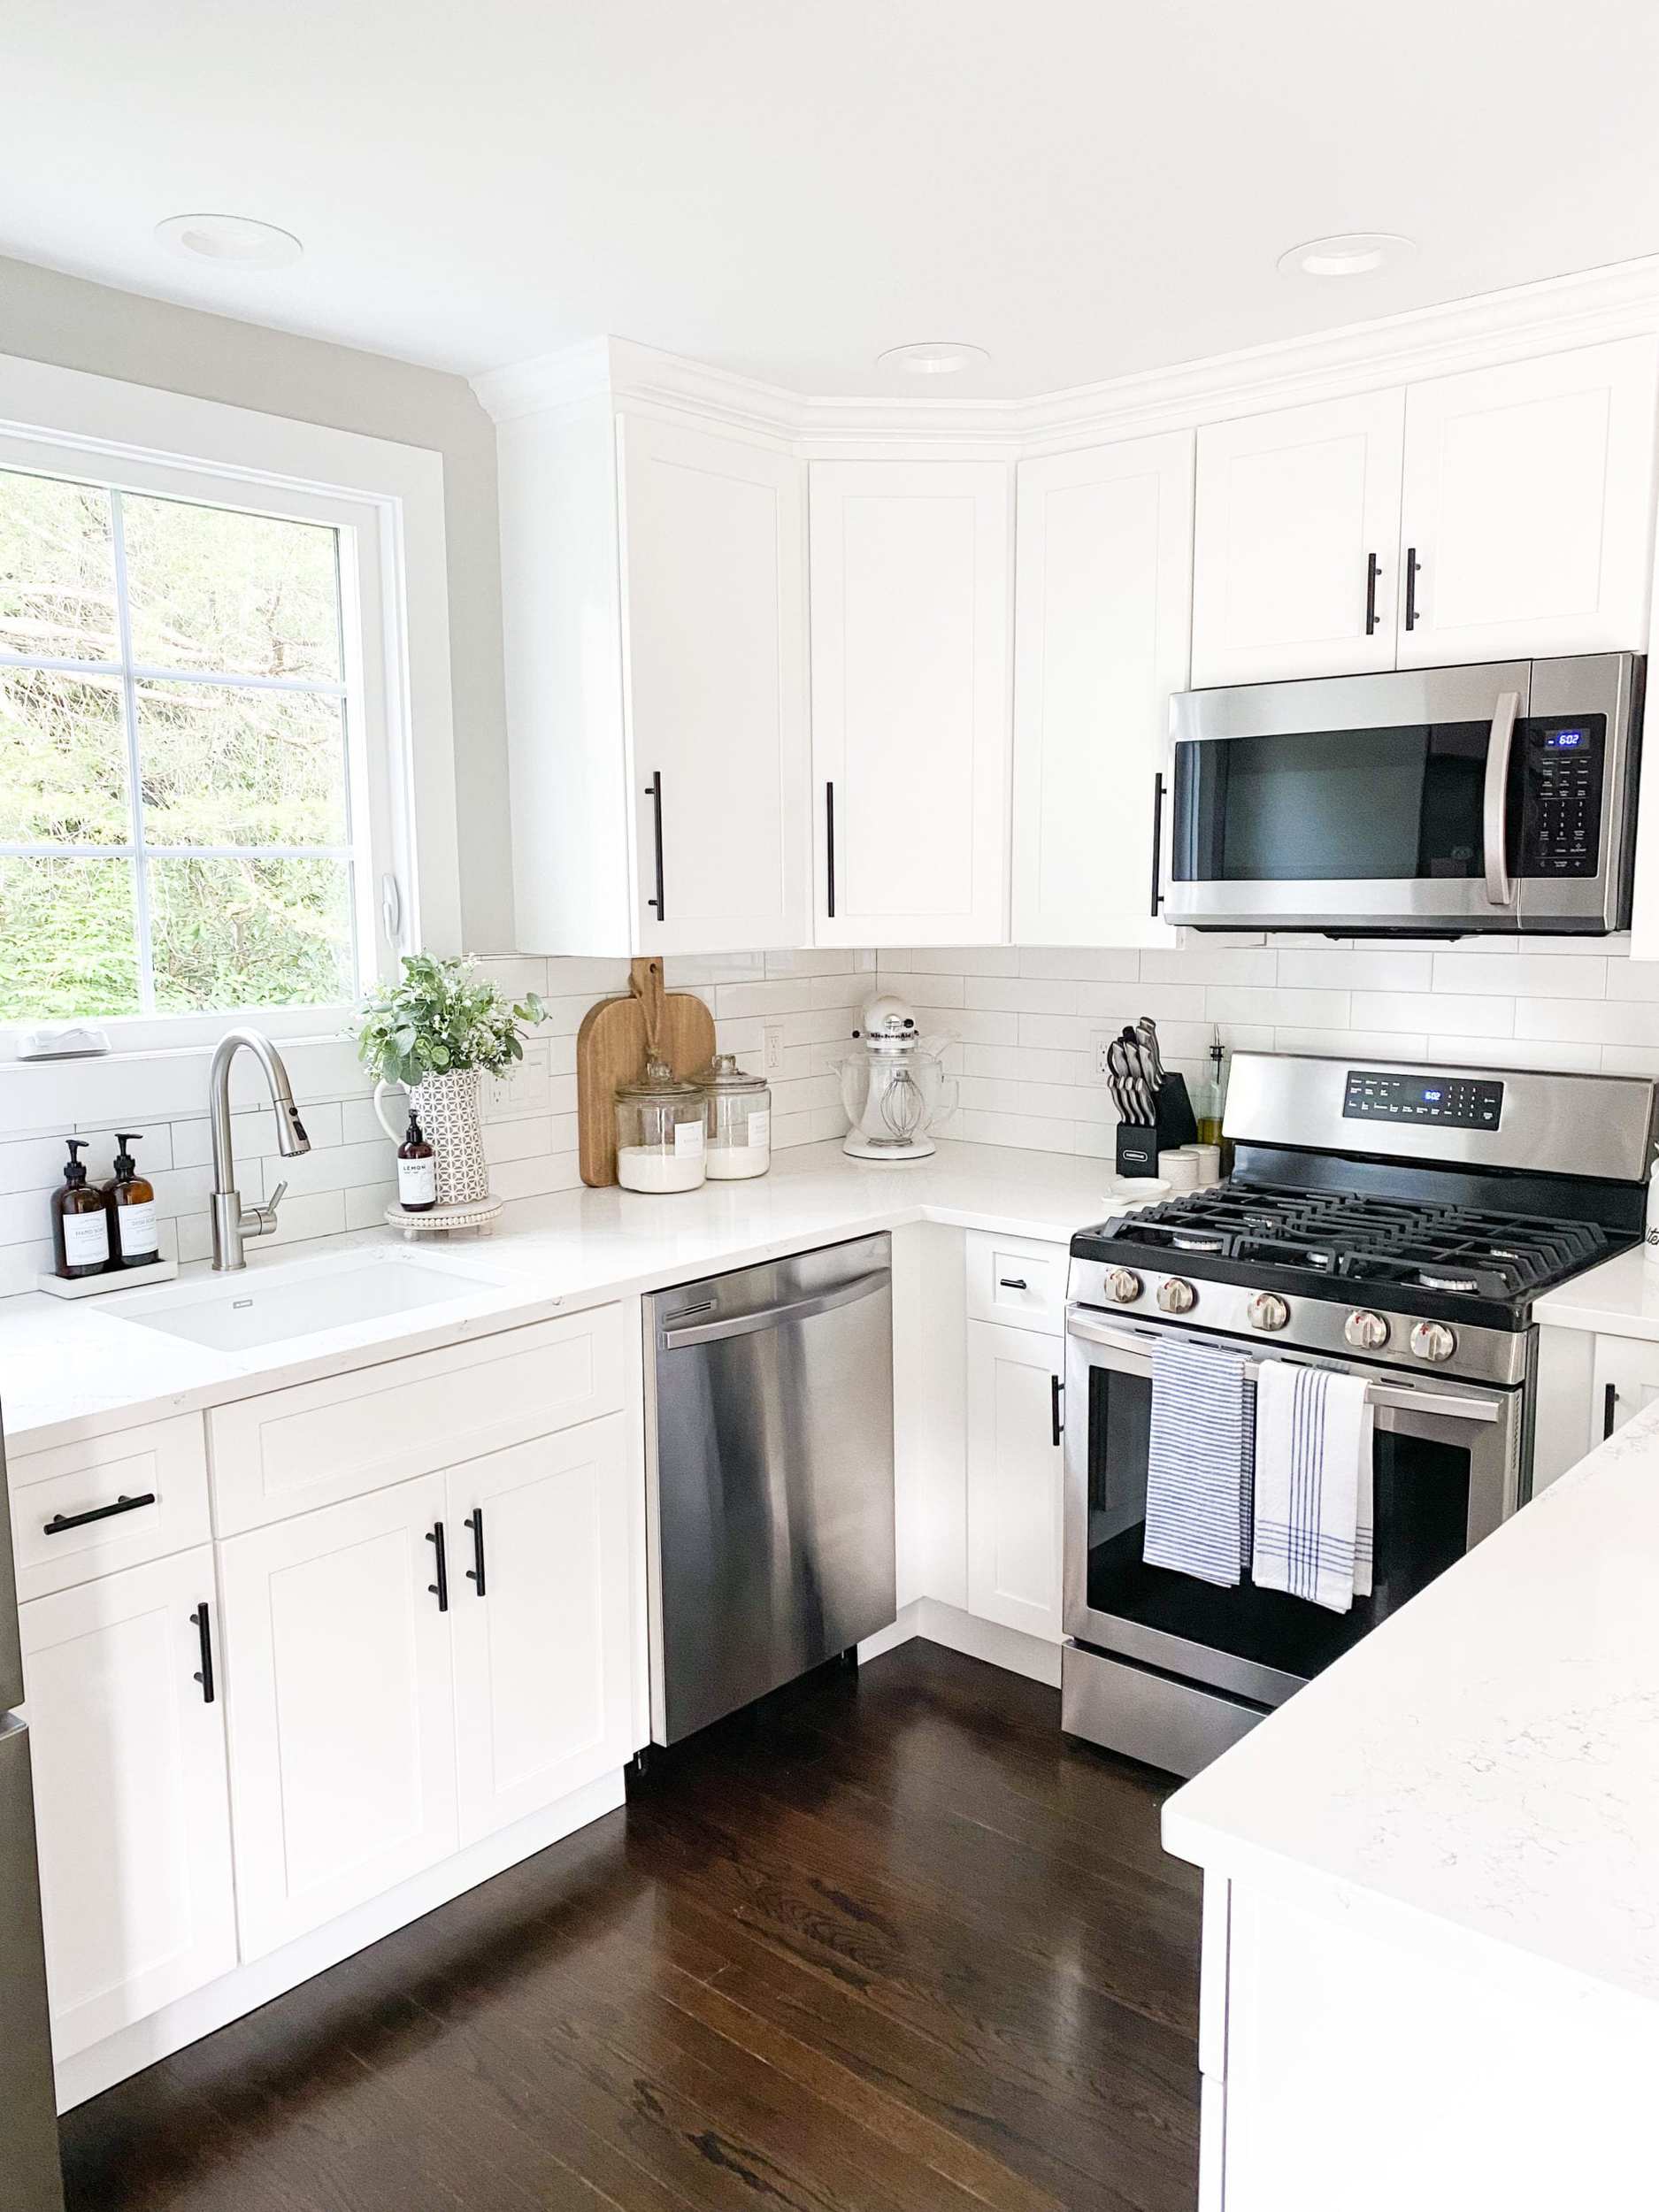
I originally wanted an island but with code there was no space, so I settled for a peninsula. I am so glad I did! This gives the kitchen SO much more counterspace and actually makes it feel bigger. We had to patch the hardwood floor underneath where the wall originally was, but I lucked out here. The person before had the floors mostly covered which actually protected it over time! When we sanded it all down and patched it they looked the exact same, you could never tell it was patched.

The next problem we had to address in the kitchen renovation was the door. The door originally swung into the kitchen thus closing off the space. If we had the door swinging in we would not have been able to have the big peninsula. We opted for an outswing door (not traditional for an outside door) and we were sent the wrong door 3 times before finally getting the outswing door! This actually worked out great because now it swings out into the three season porch which will soon be a laundry room.
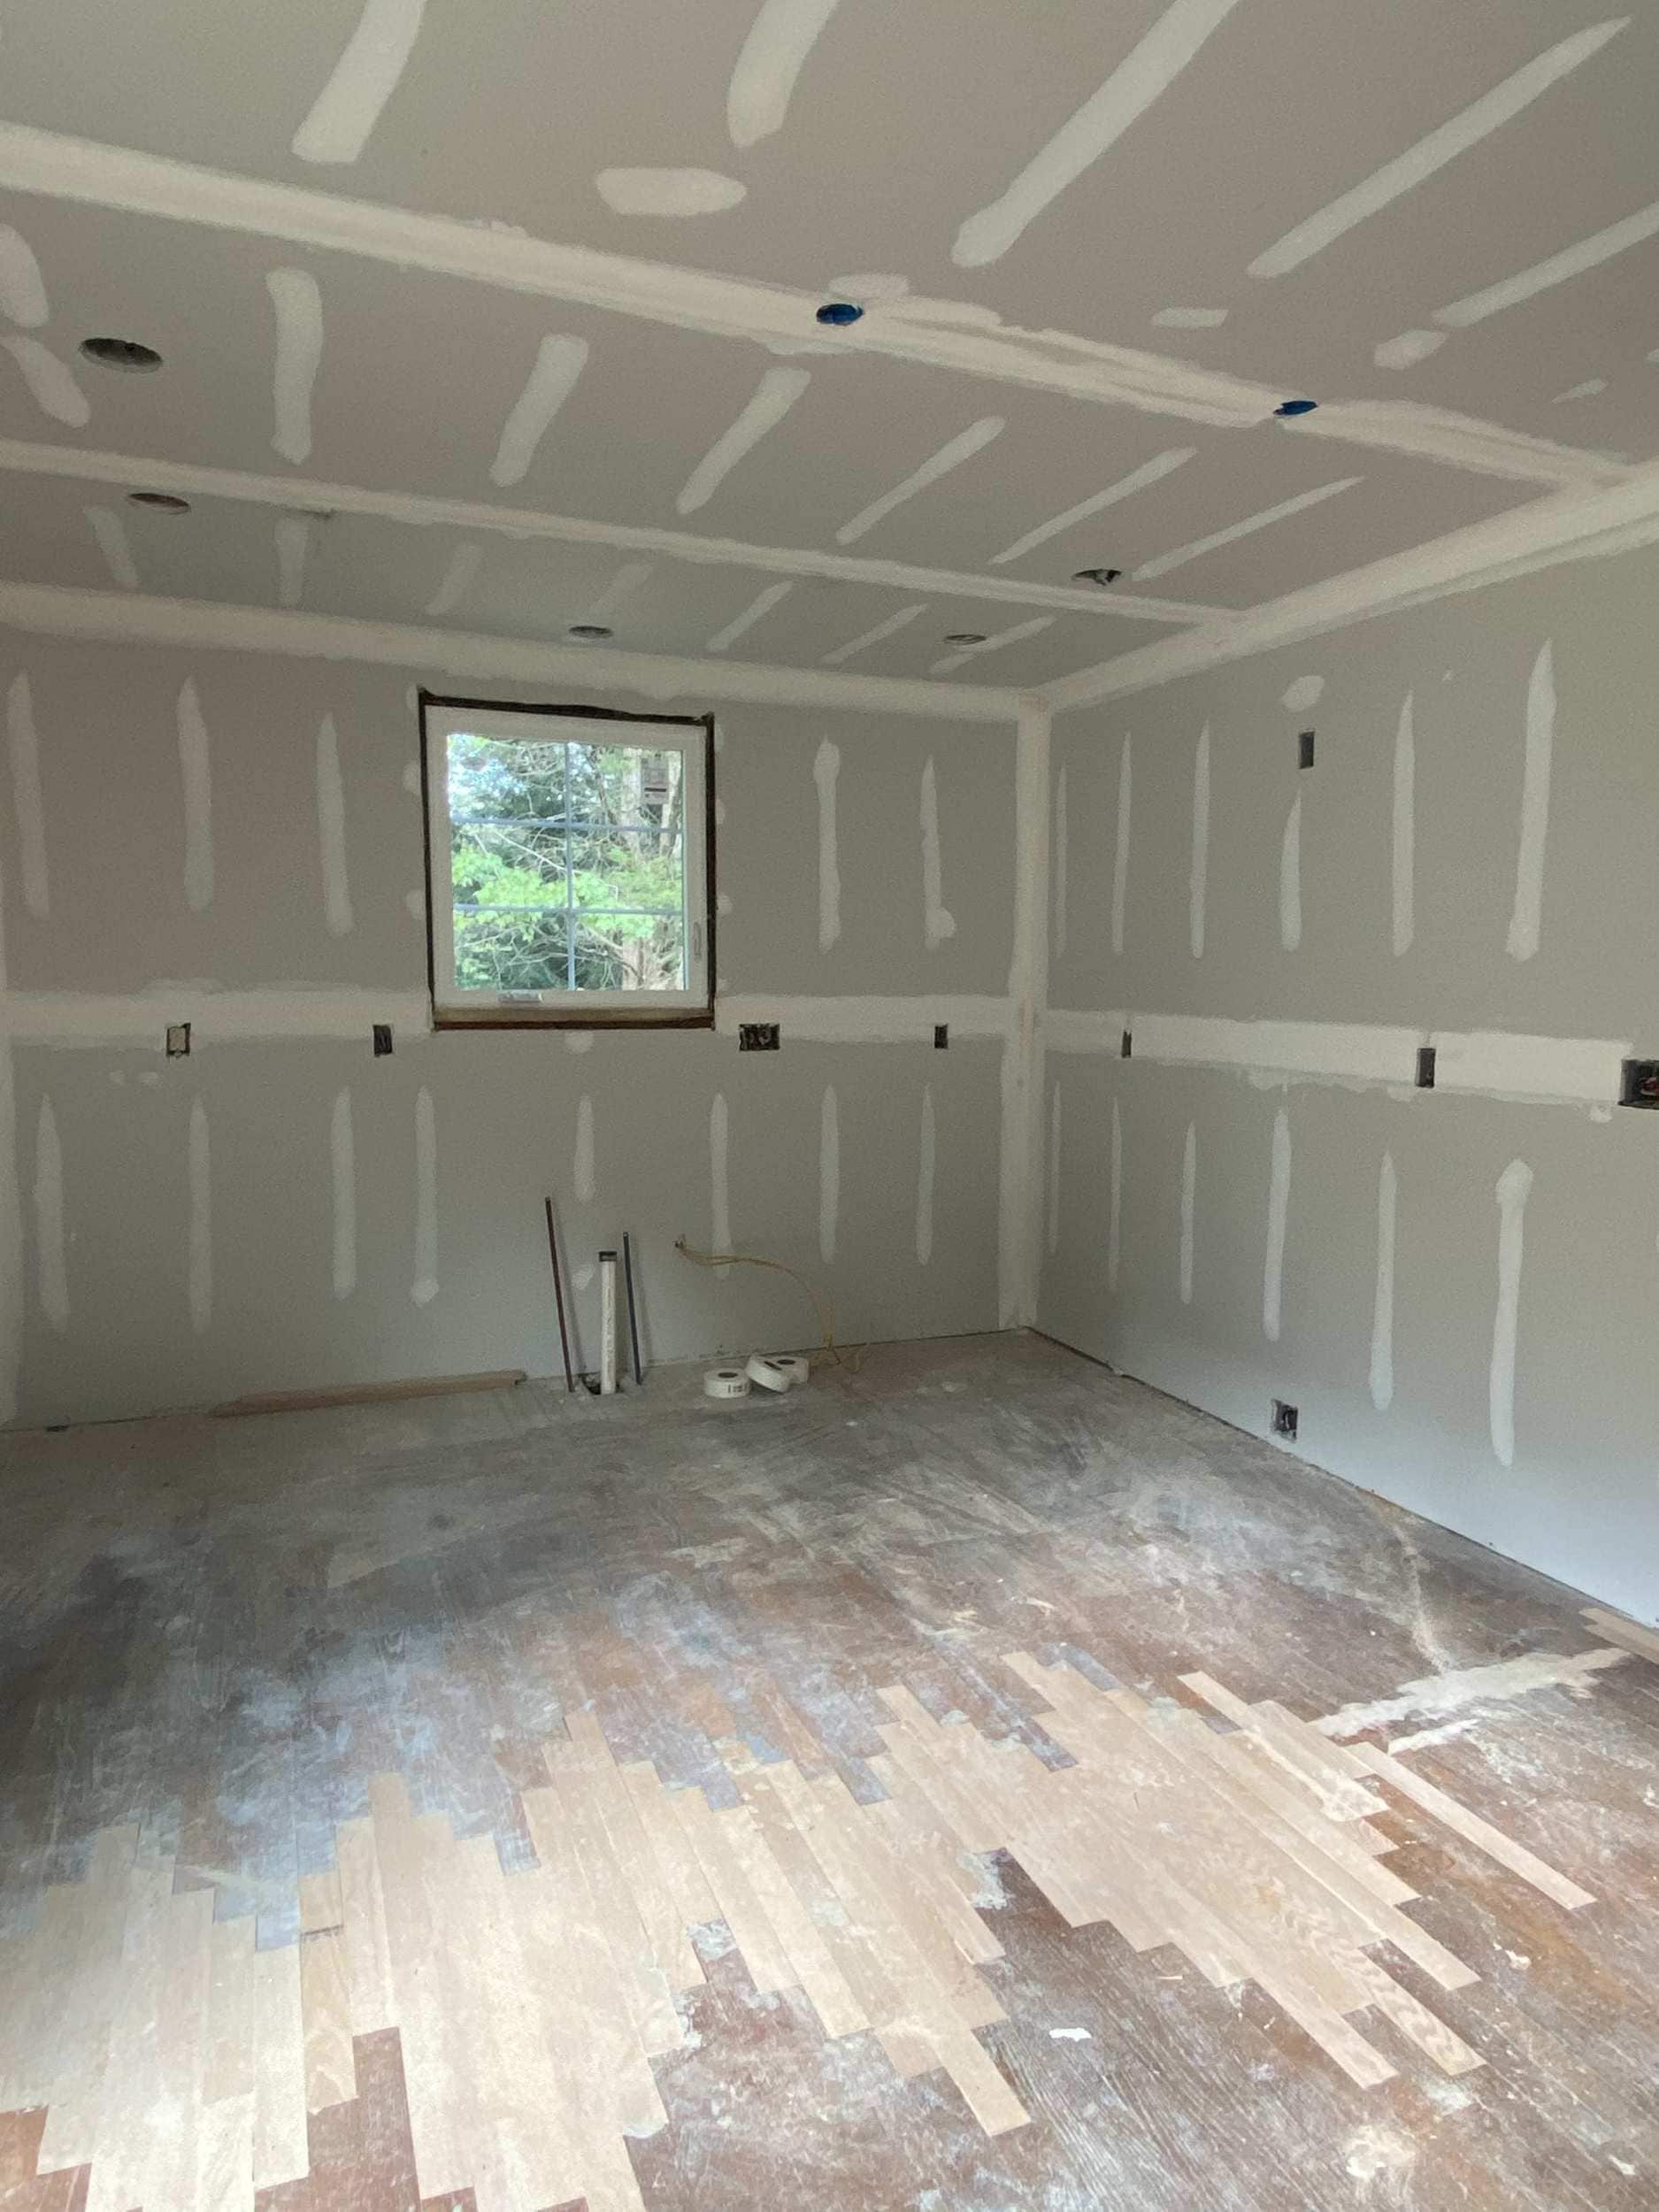
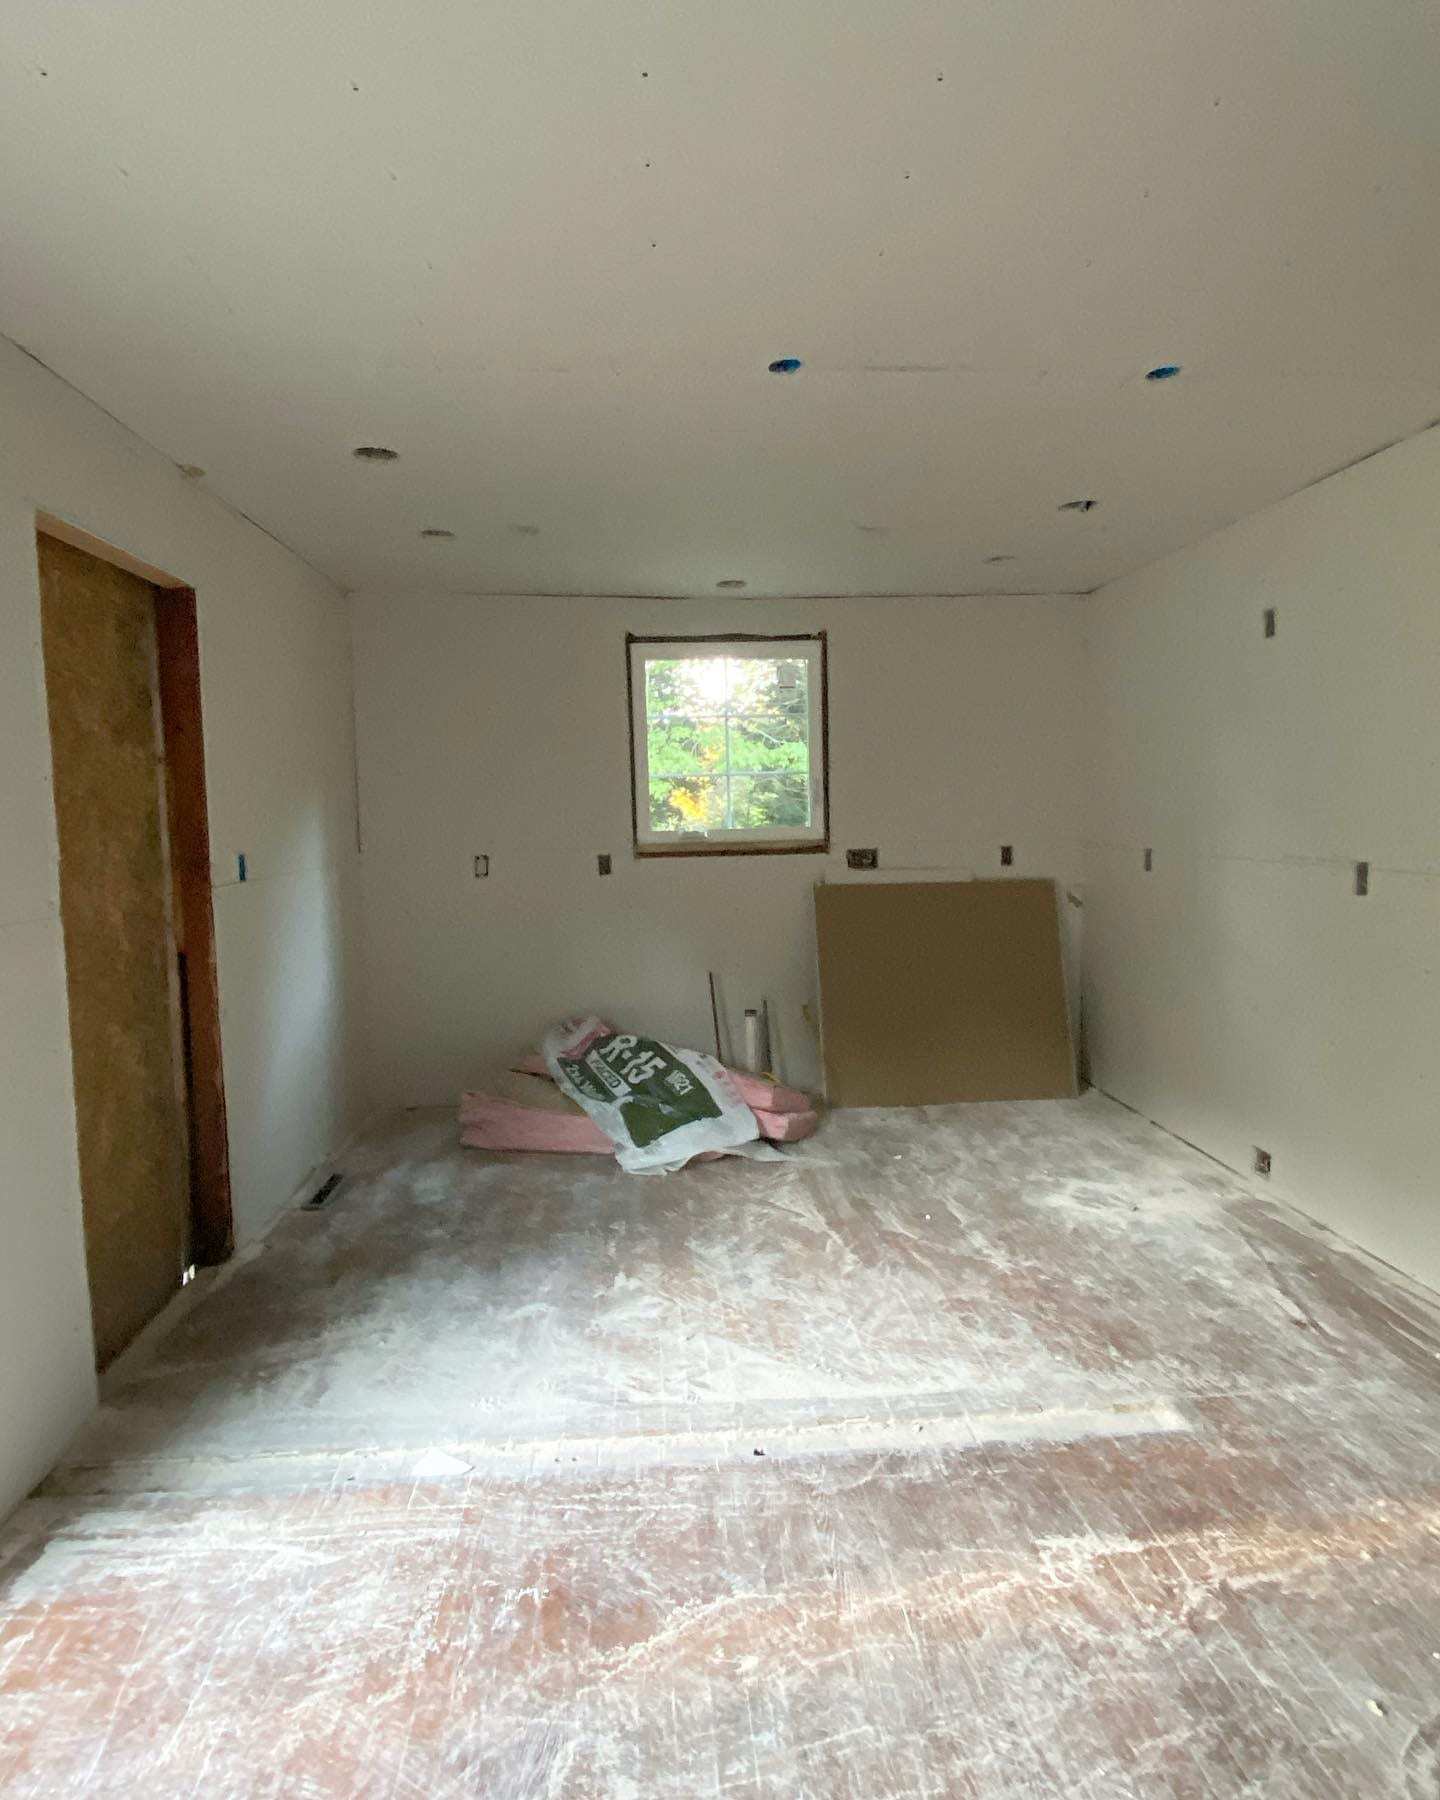
Once the floor was patched and the new sheetrock was up it was smooth sailing! We took up some of the original floor so that the new floor was worked in seamlessly. Once we sanded it down it all matched perfectly! We then put the sheetrock up and spackled things, and everything really started coming together fast.
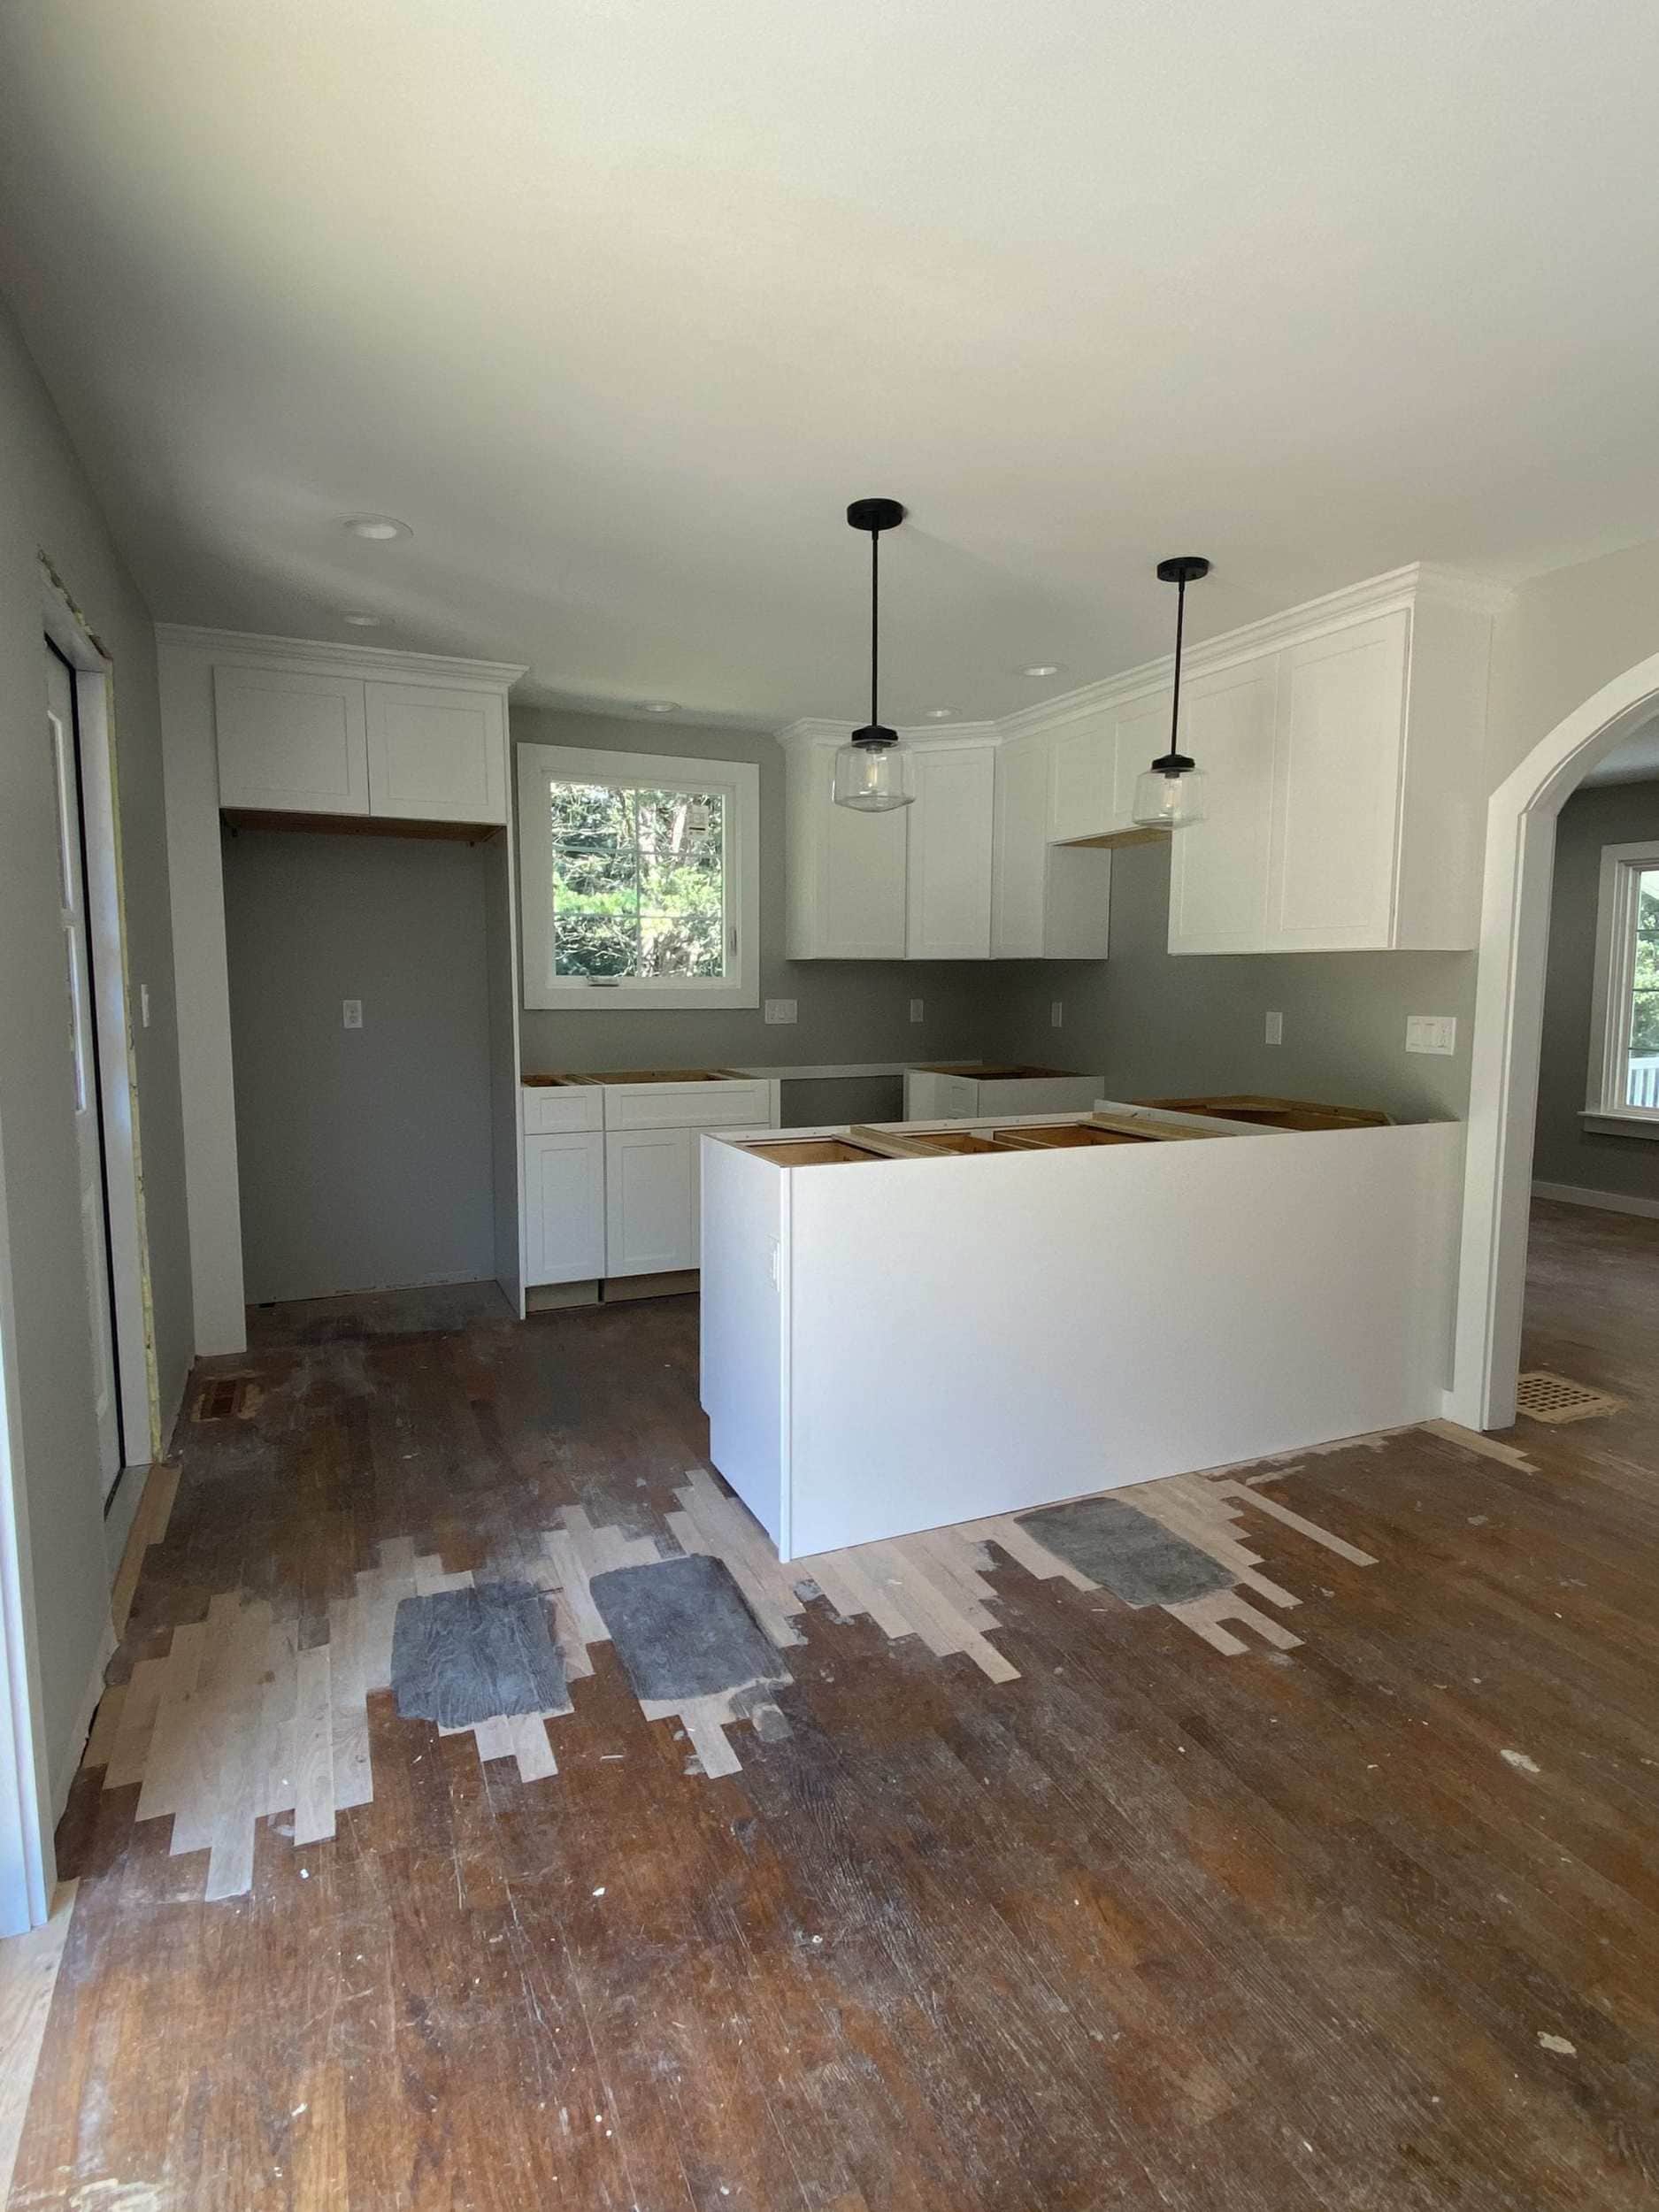
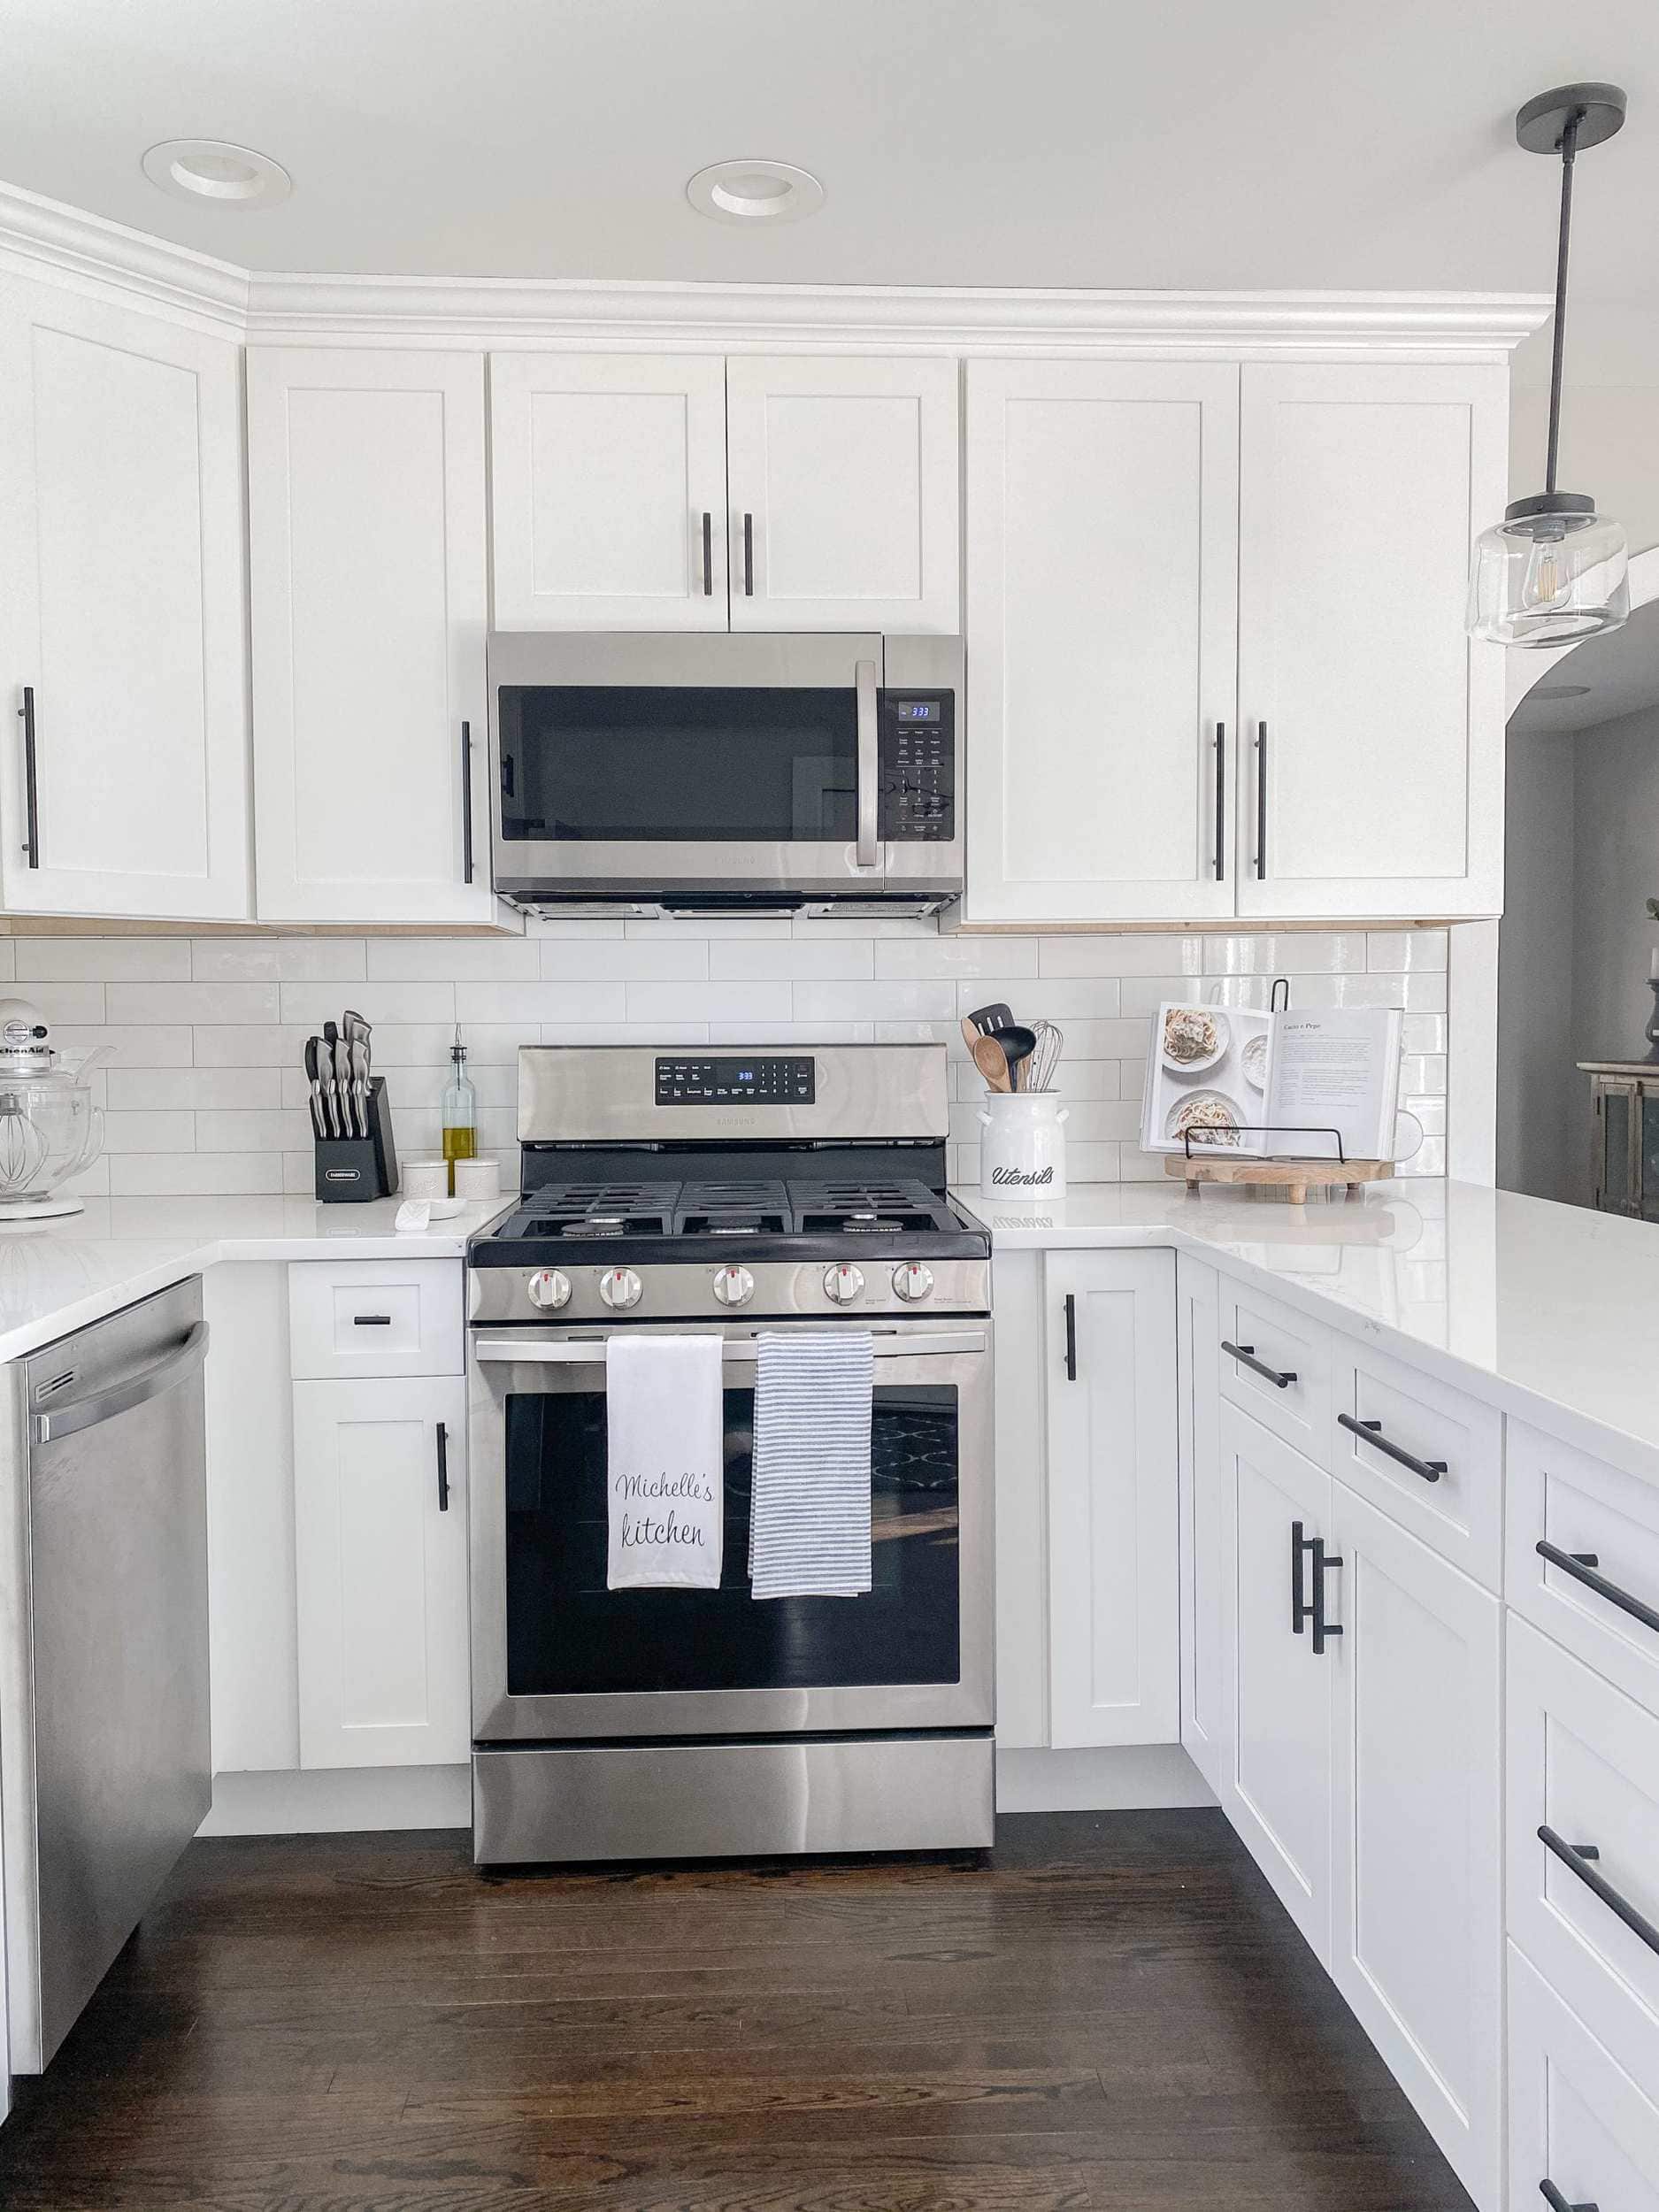
We had our cabinets delivered from Fabuwood, a local company, and then we sanded down the floors and stained them with a Jacobean stain.
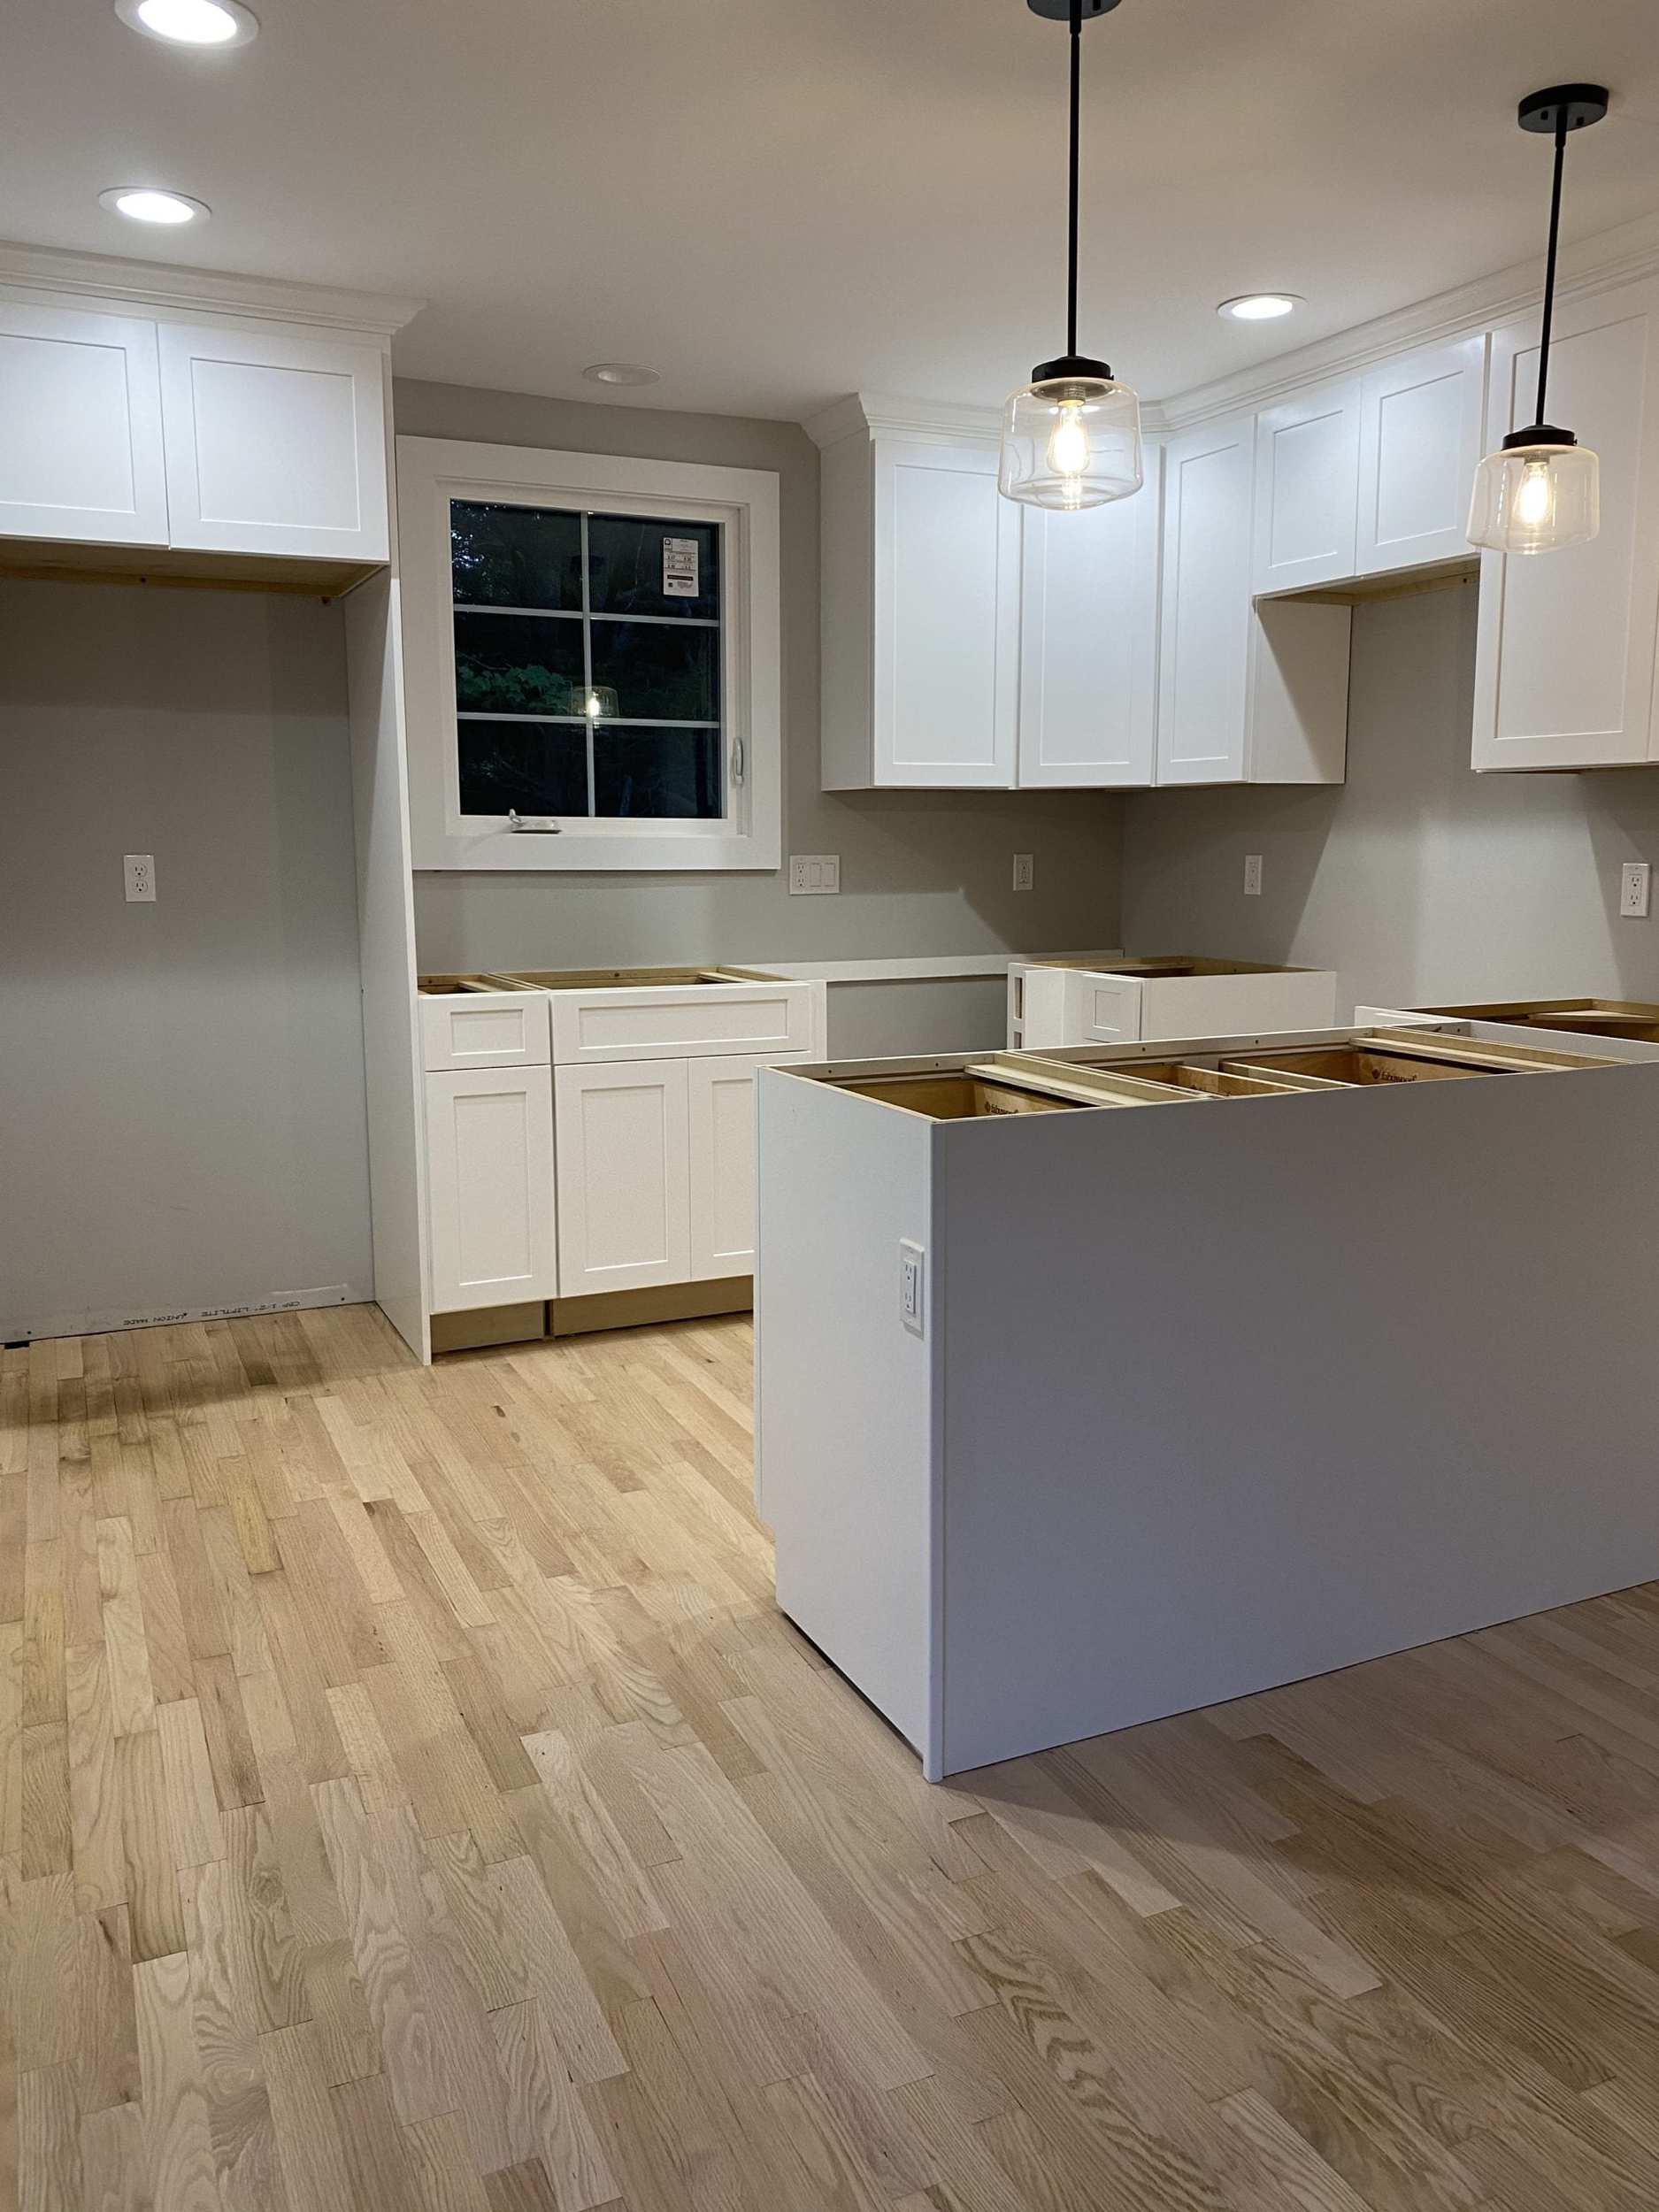

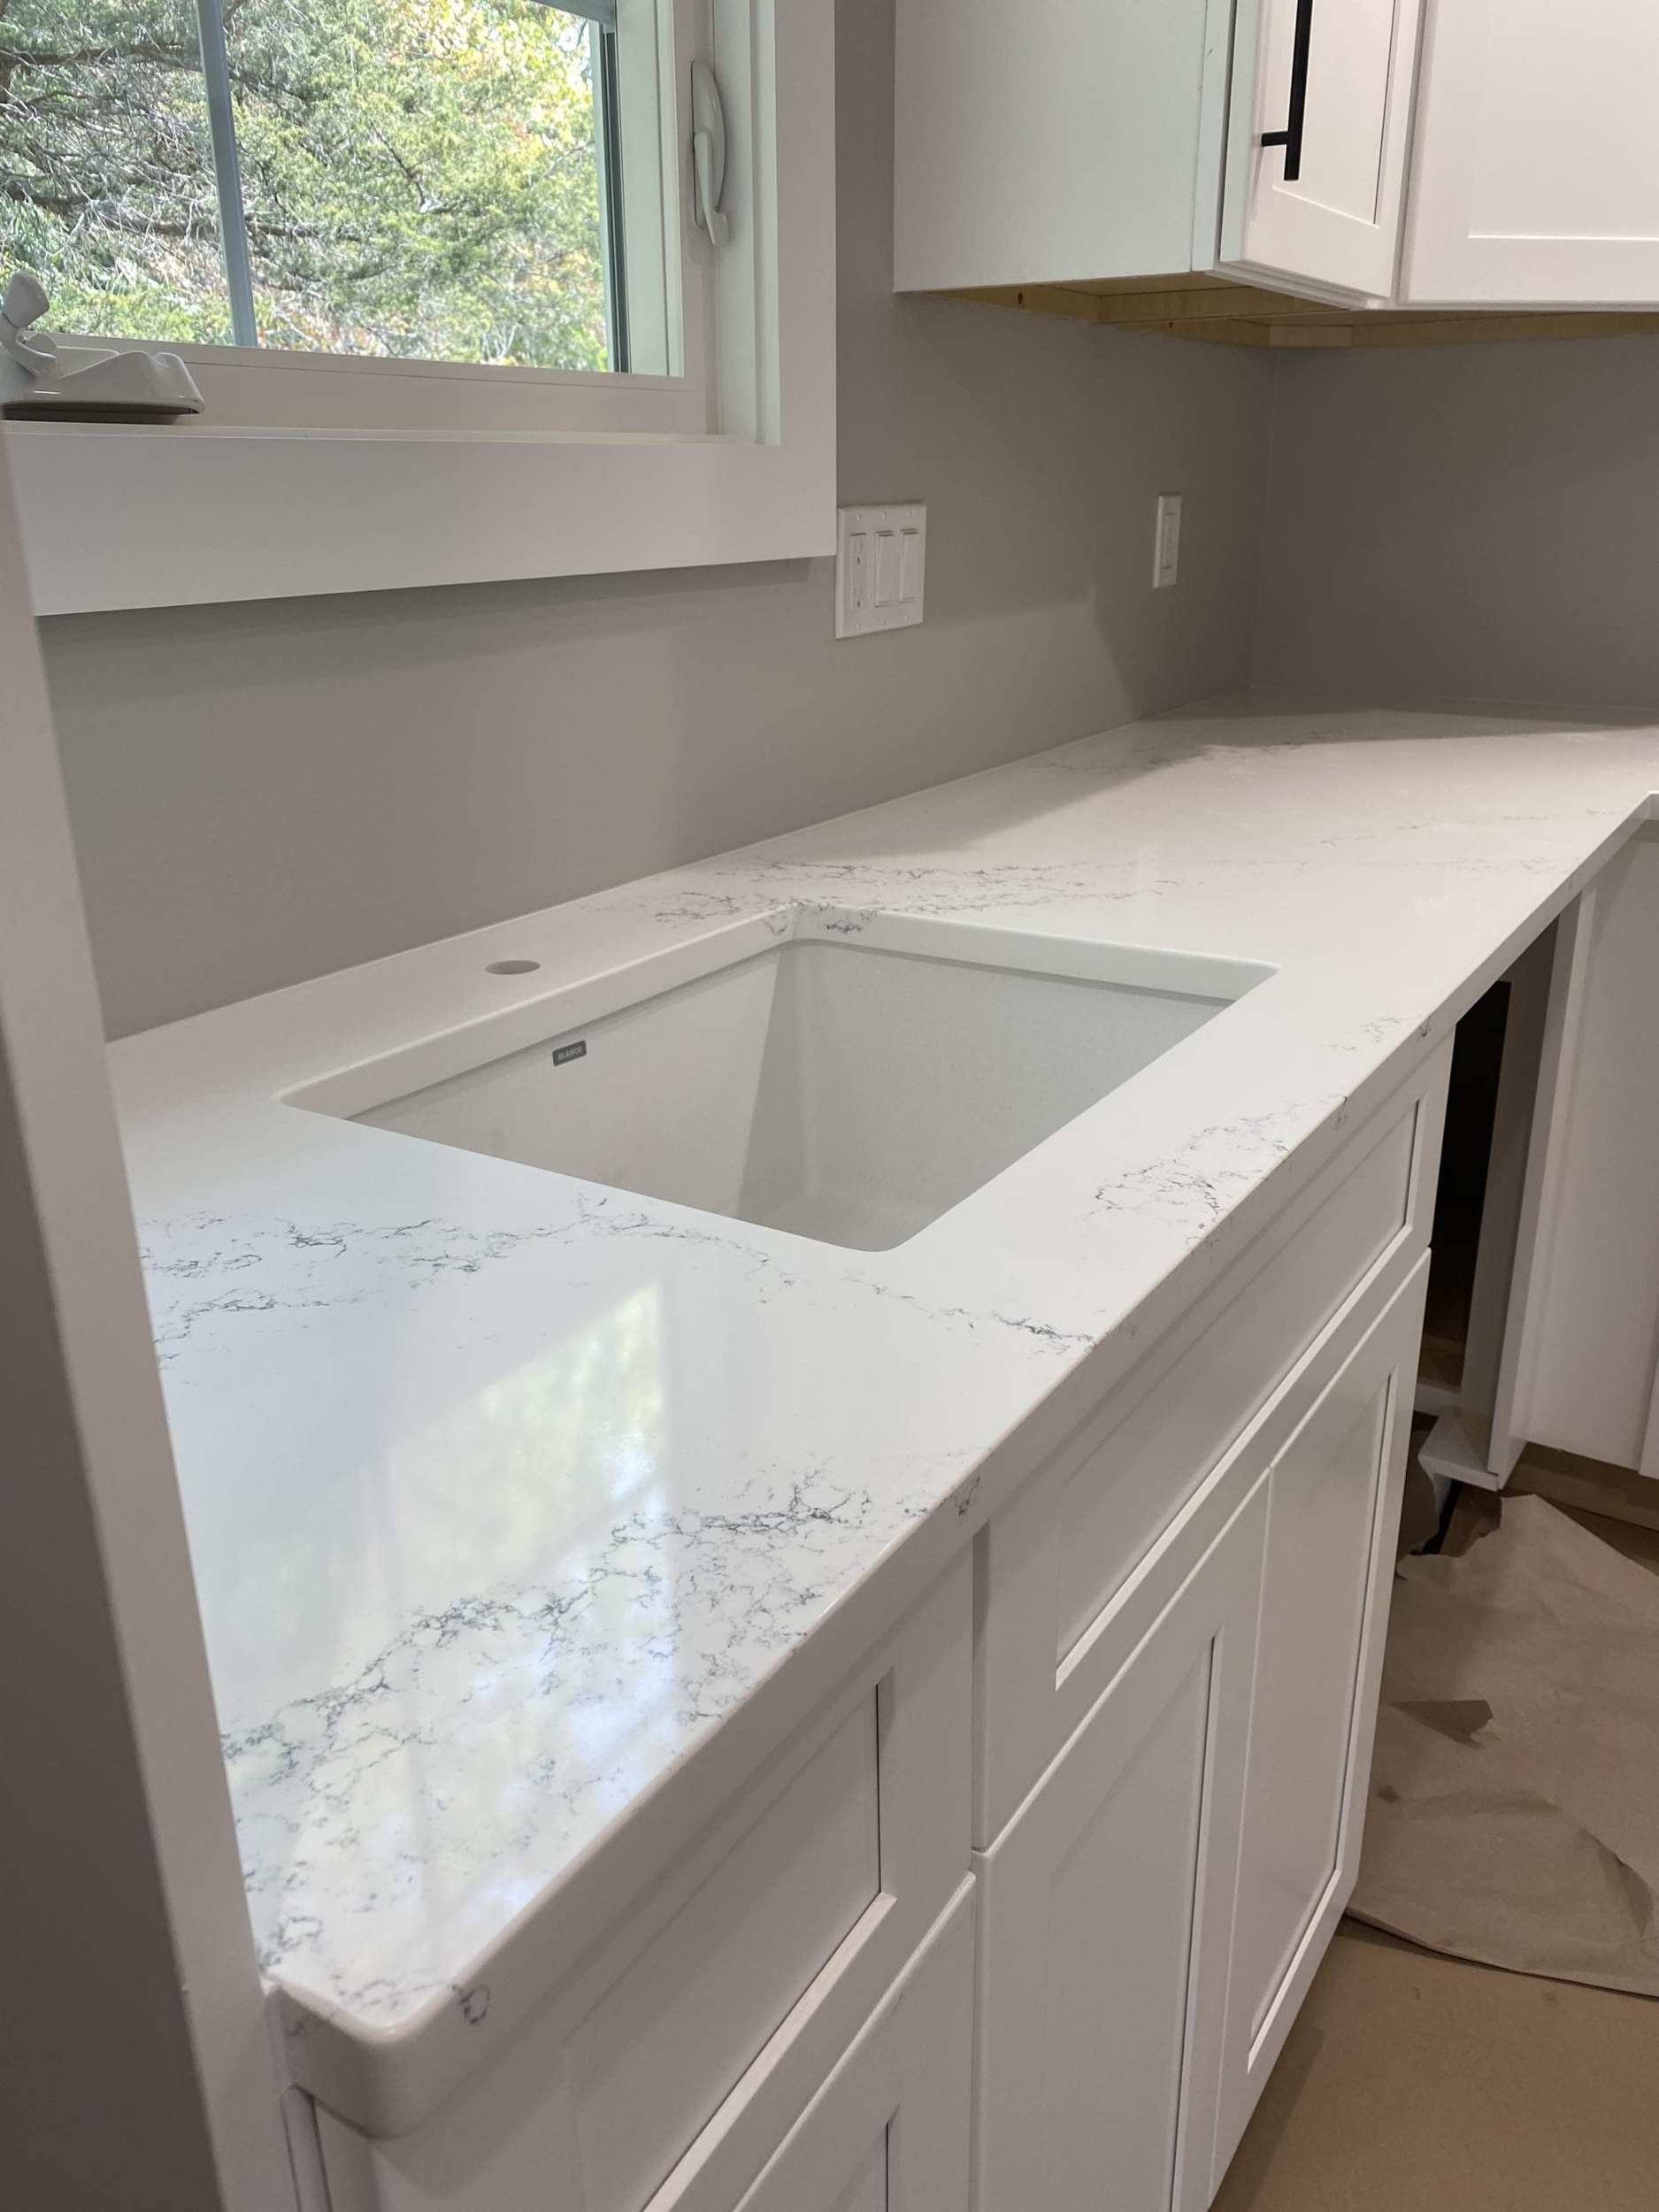
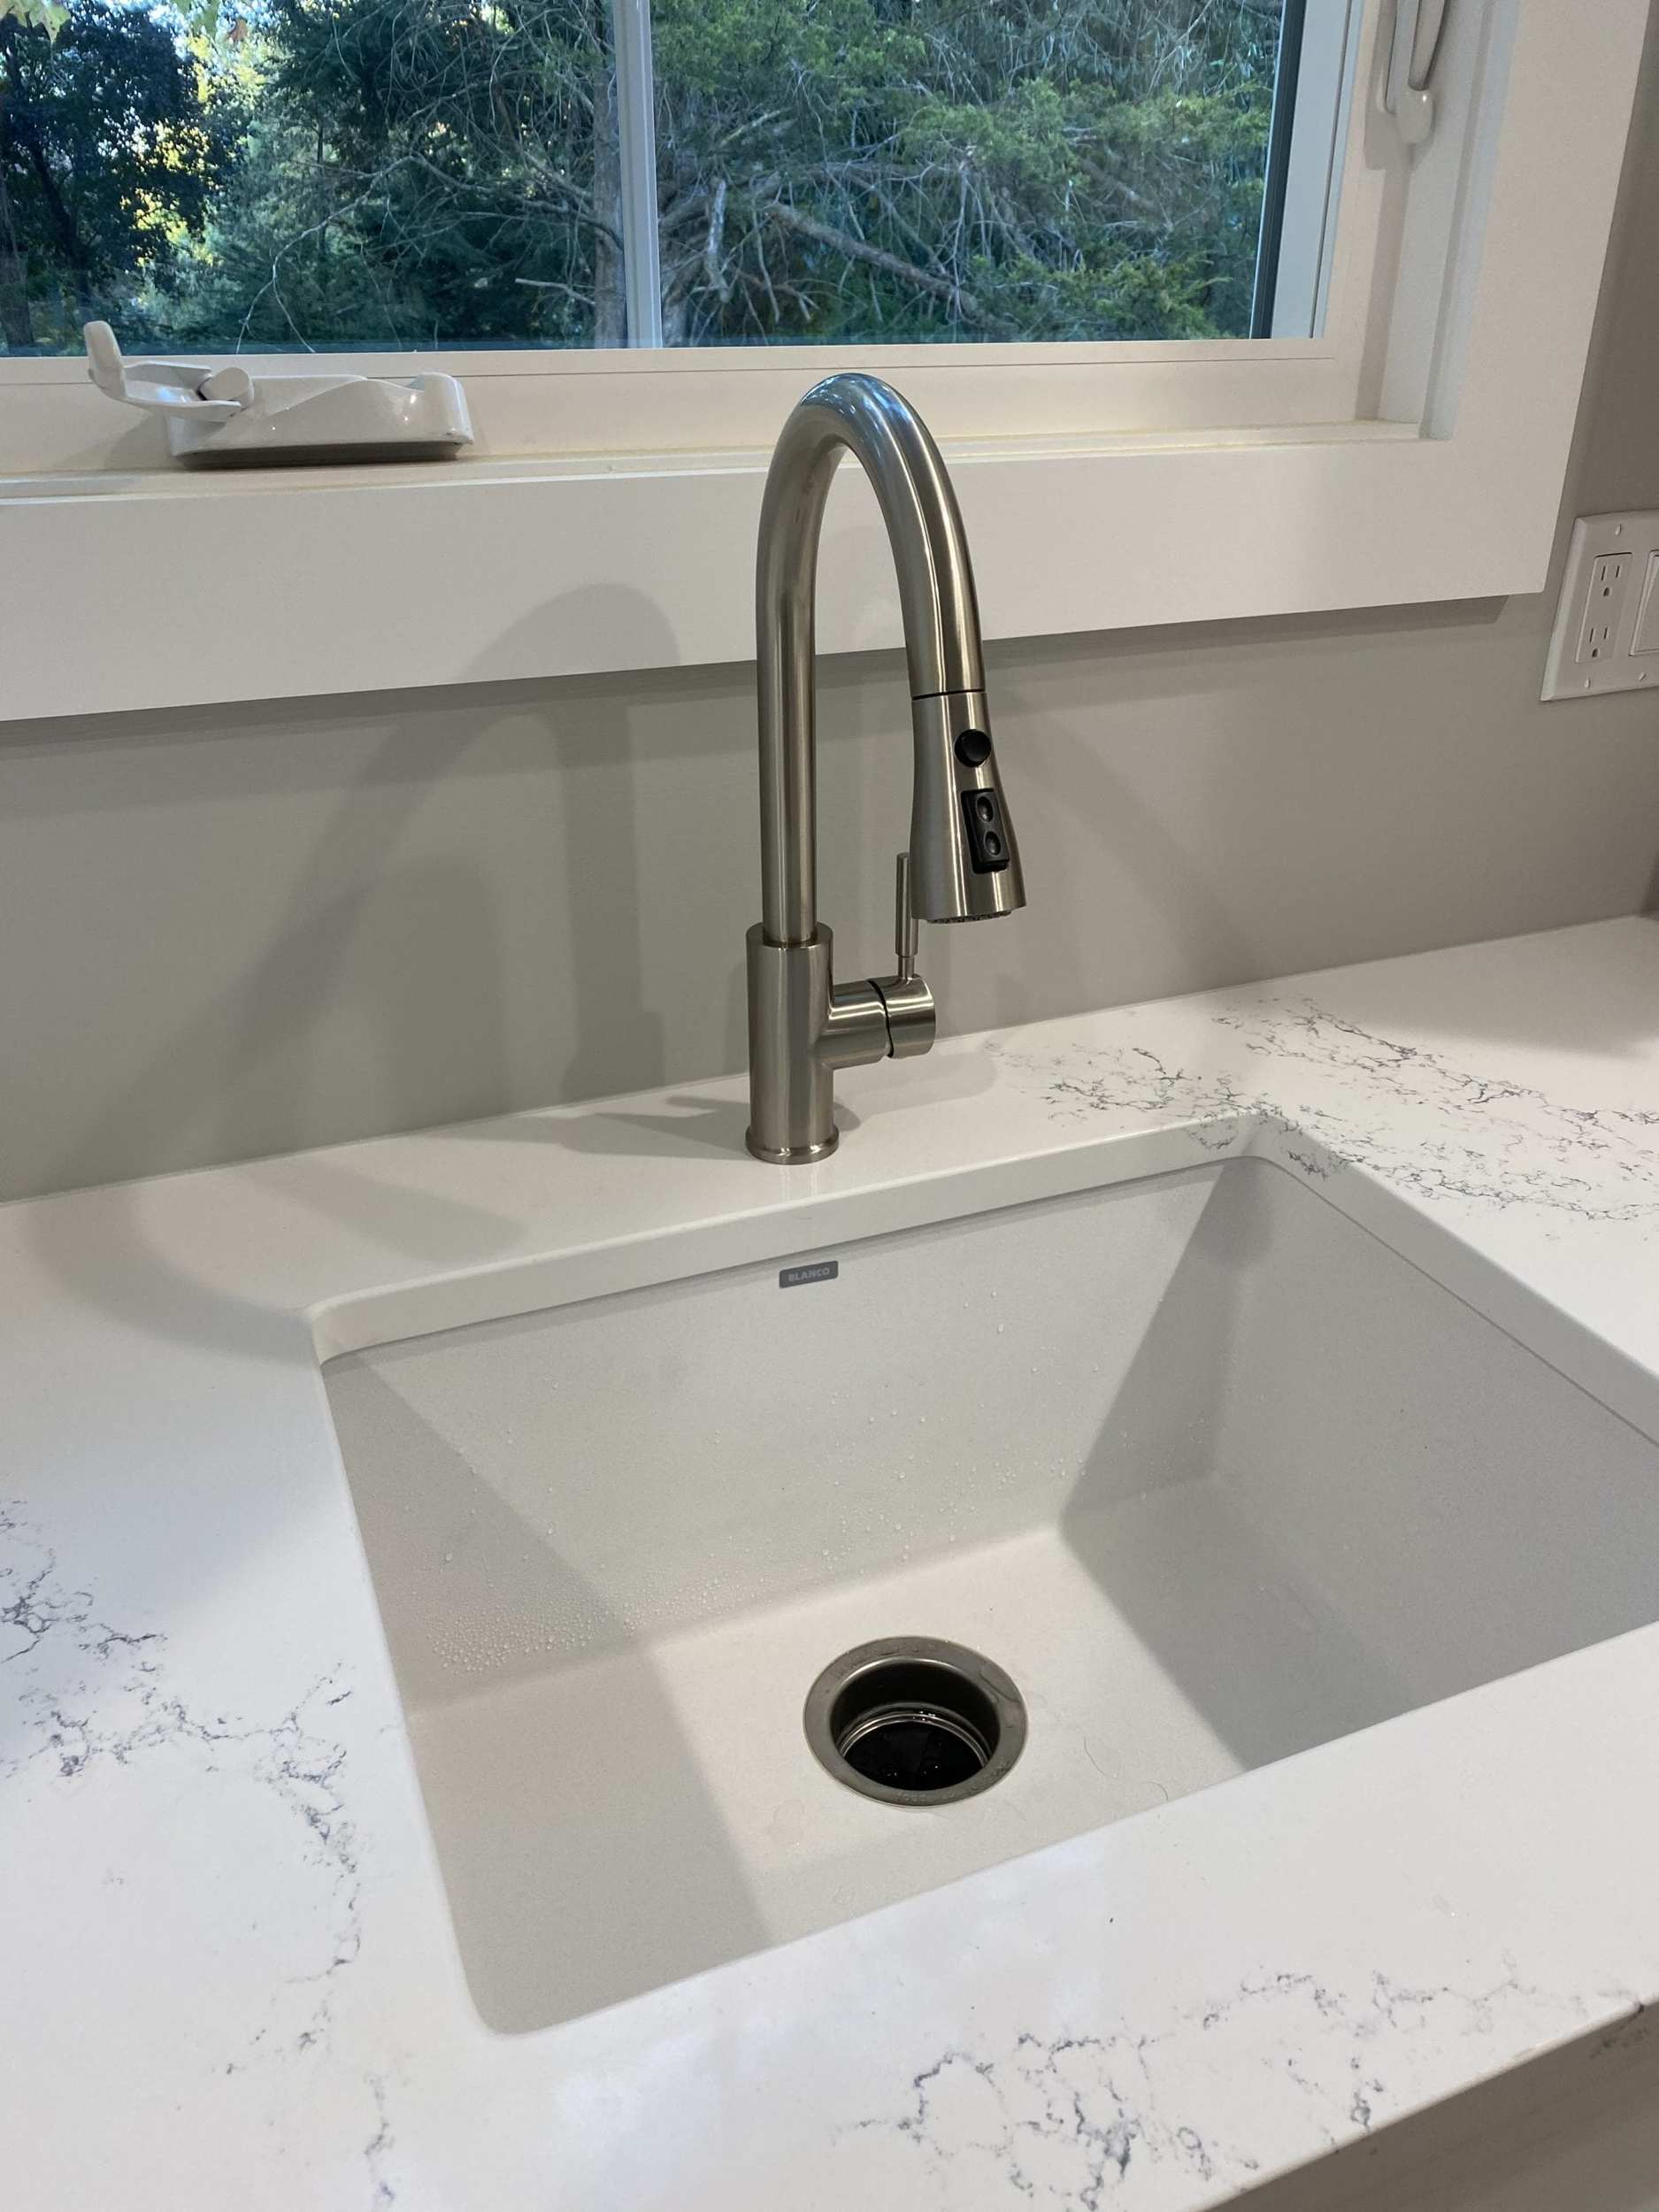
Next up after sanding and getting the first coat of stain down was the coutnertops! They are Hanstone Quartz Chantilly and I did pay extra to get the jumbo slab so I wouldn’t have a seam…it was totally worth it. These countertops were 100% worth the extra money, you only buy countertops once right?!
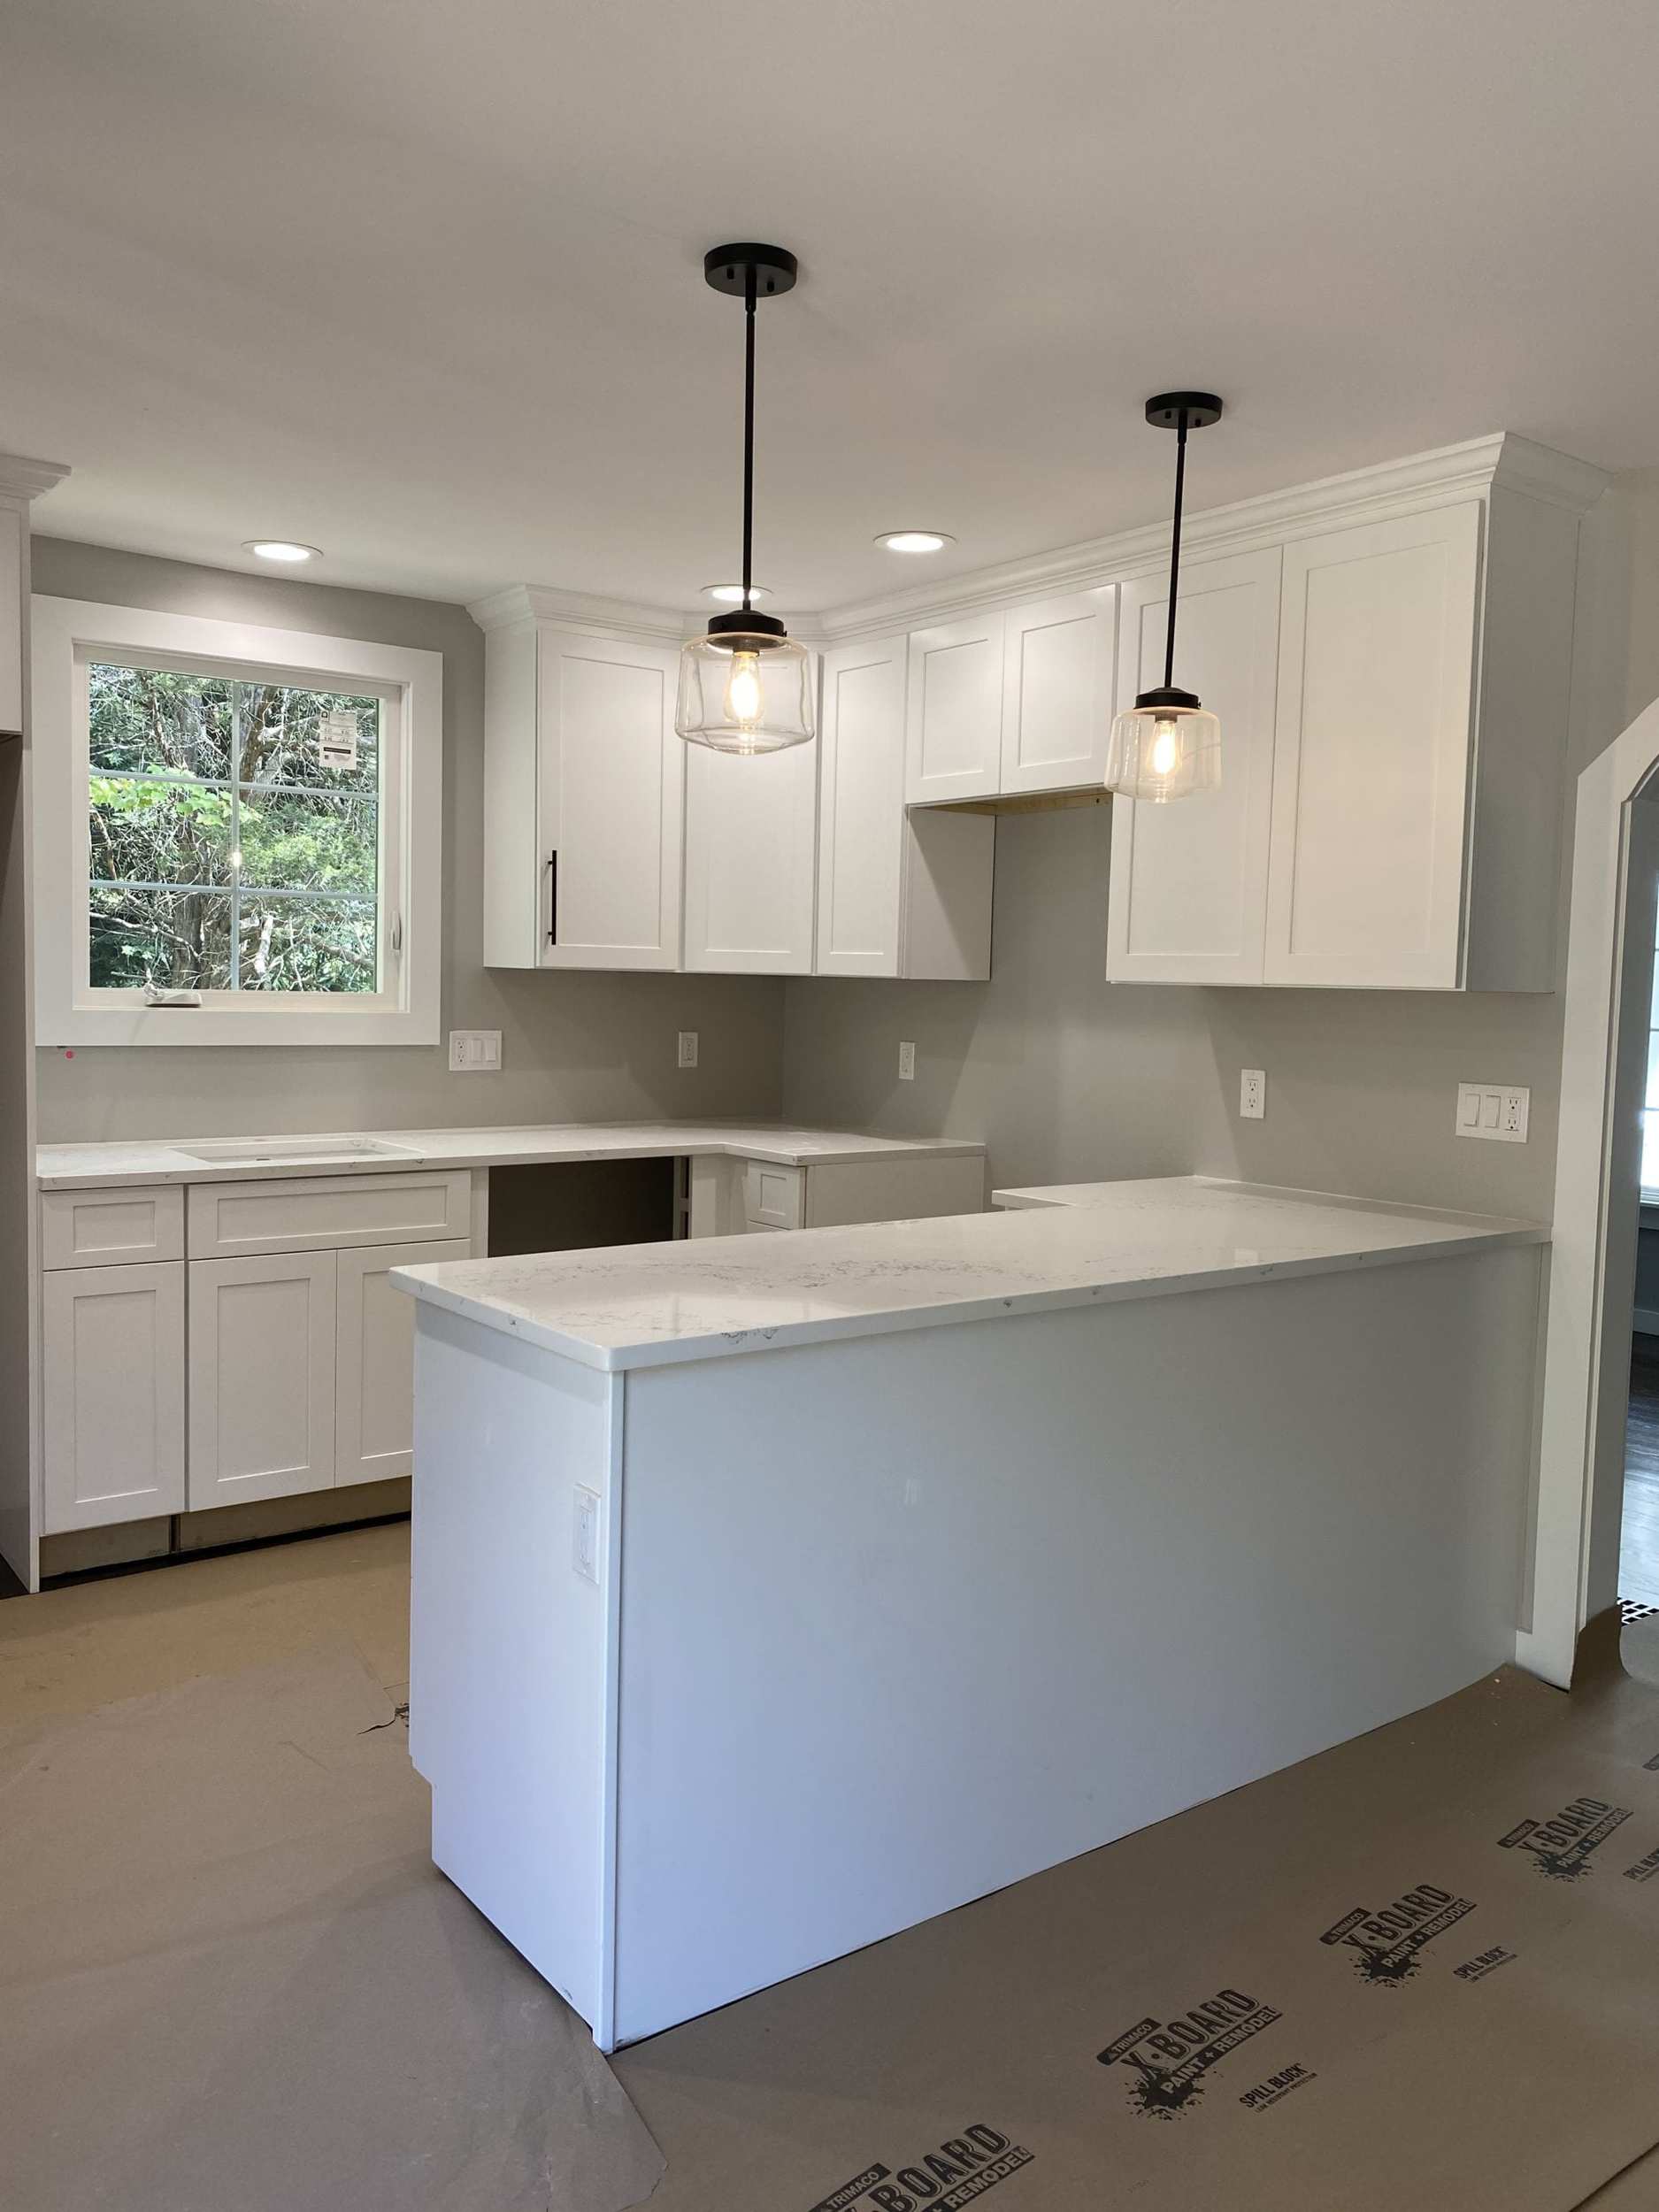
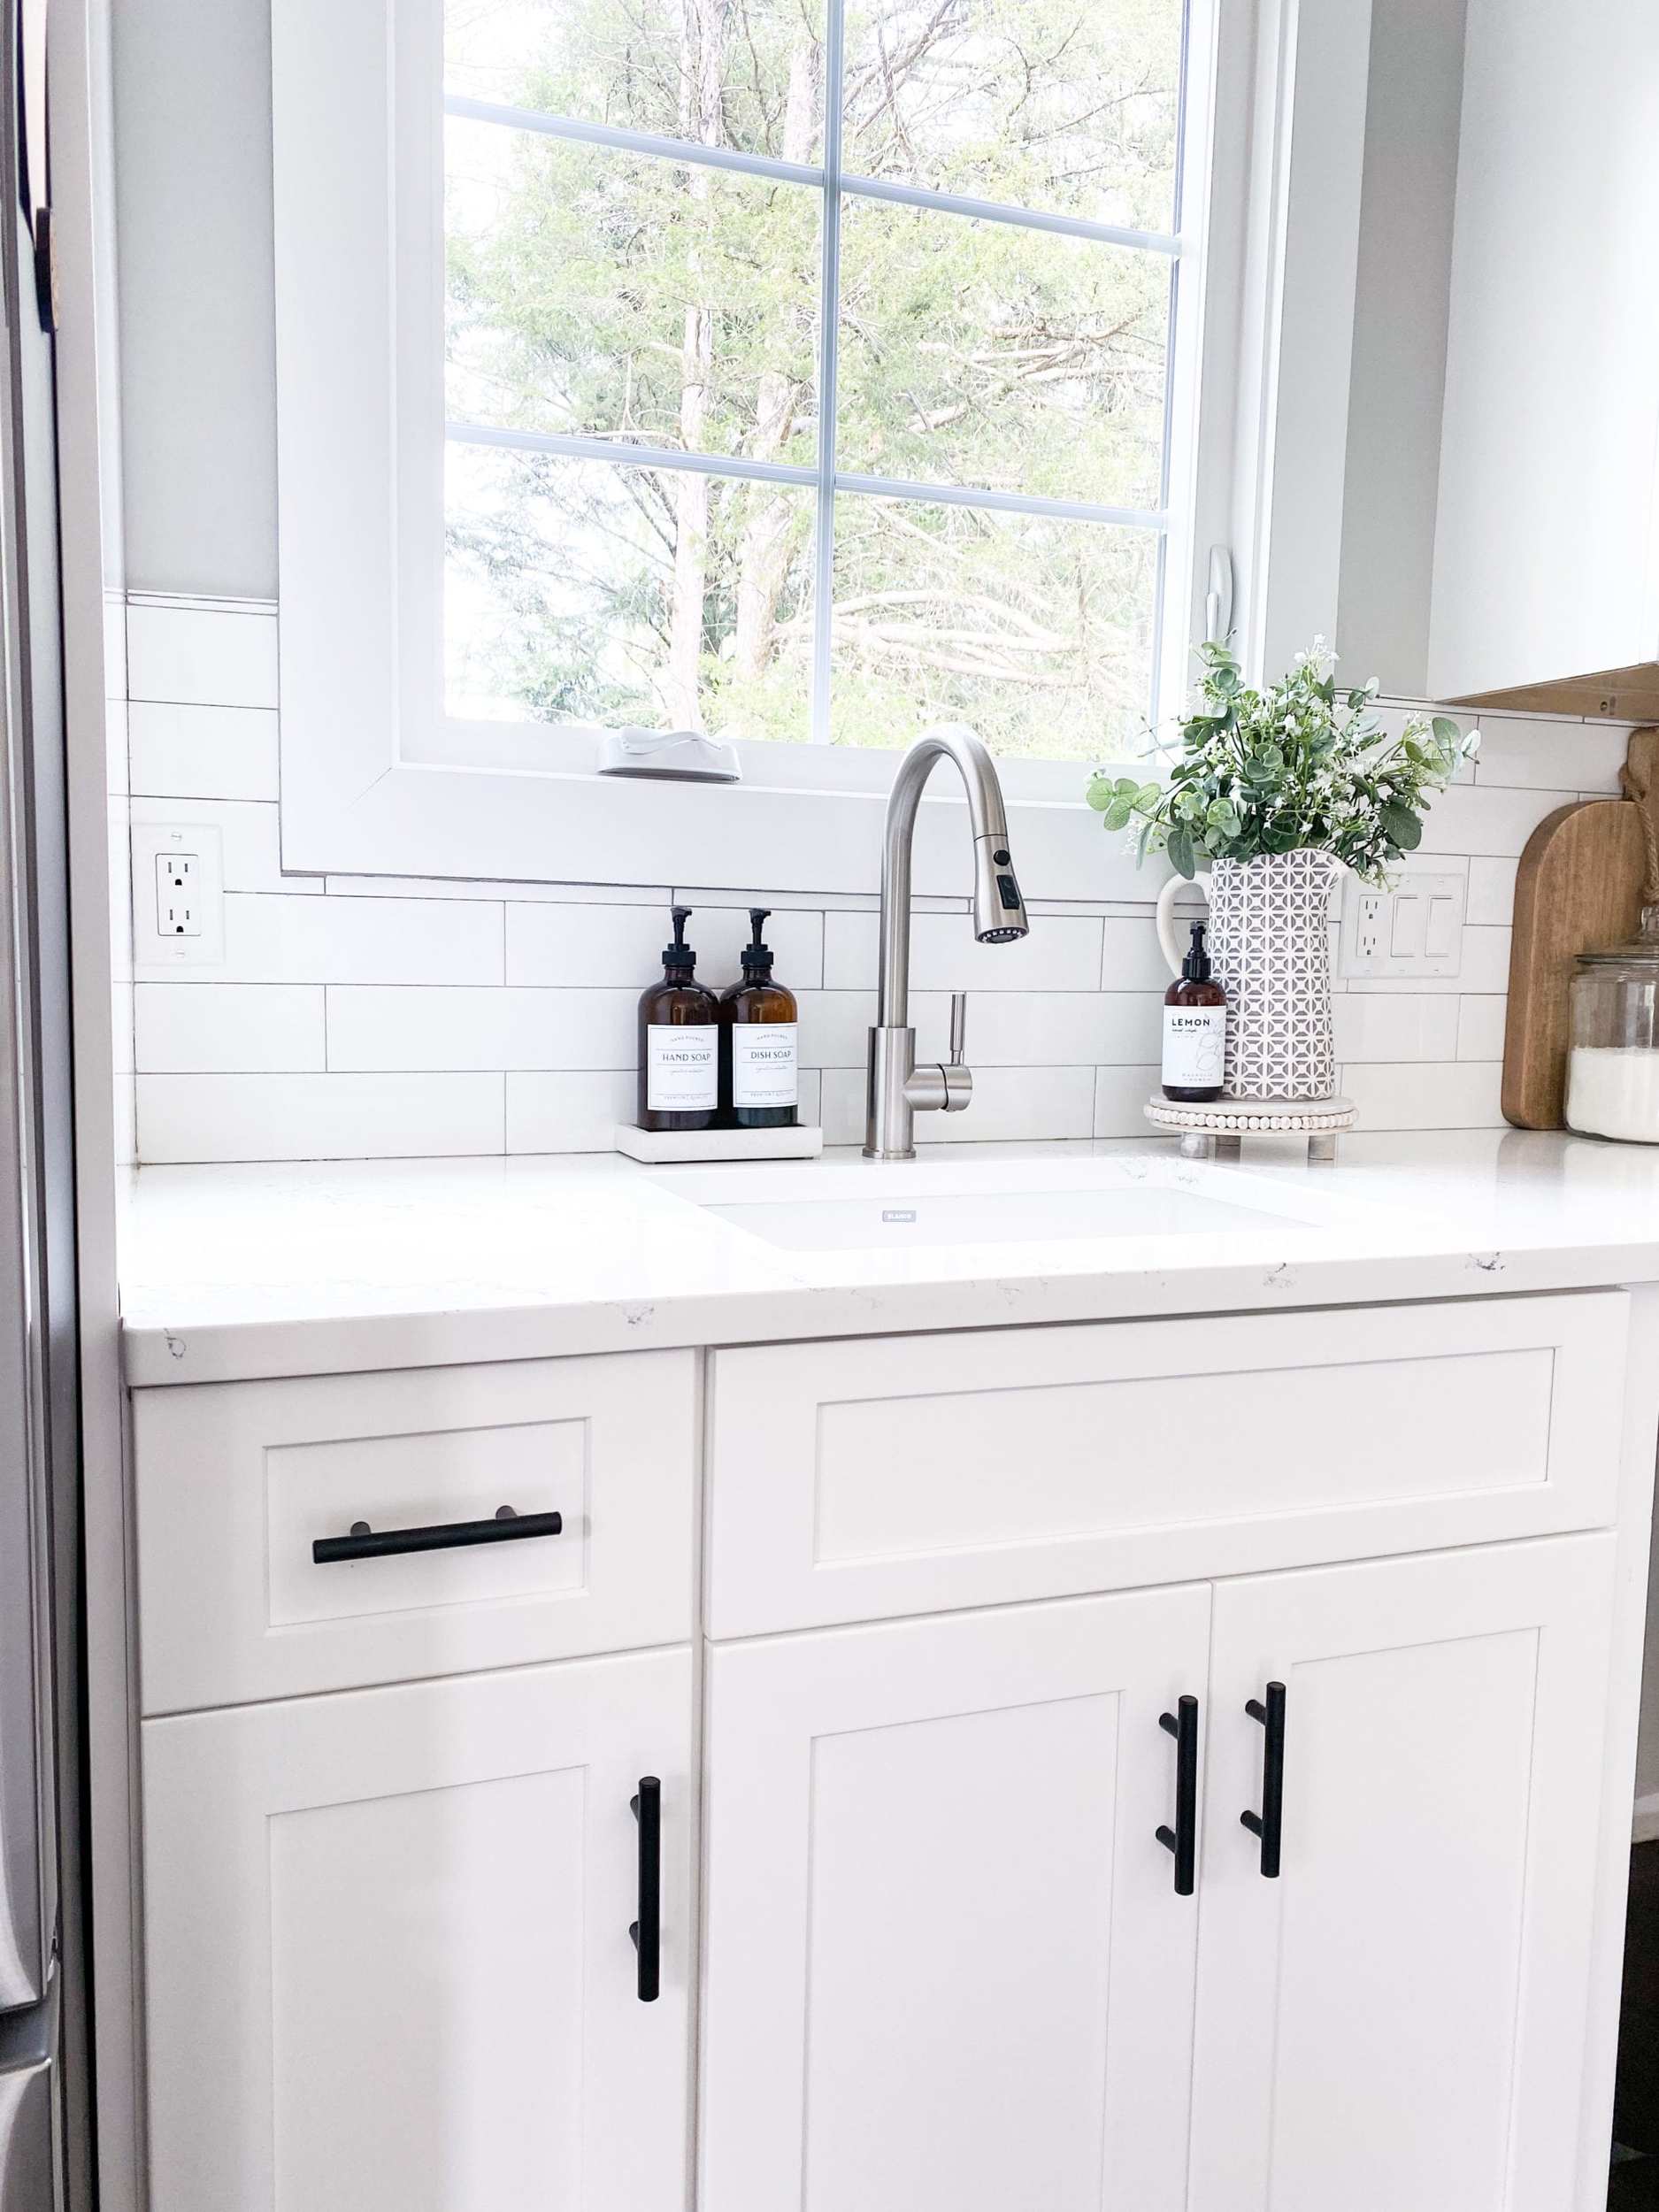
Now we were in the final stretch of the kitchen renovation! Countertops and cabinets were in, floors were almost done, it was time for the finishing touches! I decided to go with two very simple pendants over the peninsula and they were so cheap from amazon. I also got my faucet and cabinet pulls off amazon. We did the backsplash last, and I opted for a simple white subway tile. I know an all white kitchen is not everybody’s cup of tea but I had always dreamed of an all white kitchen!
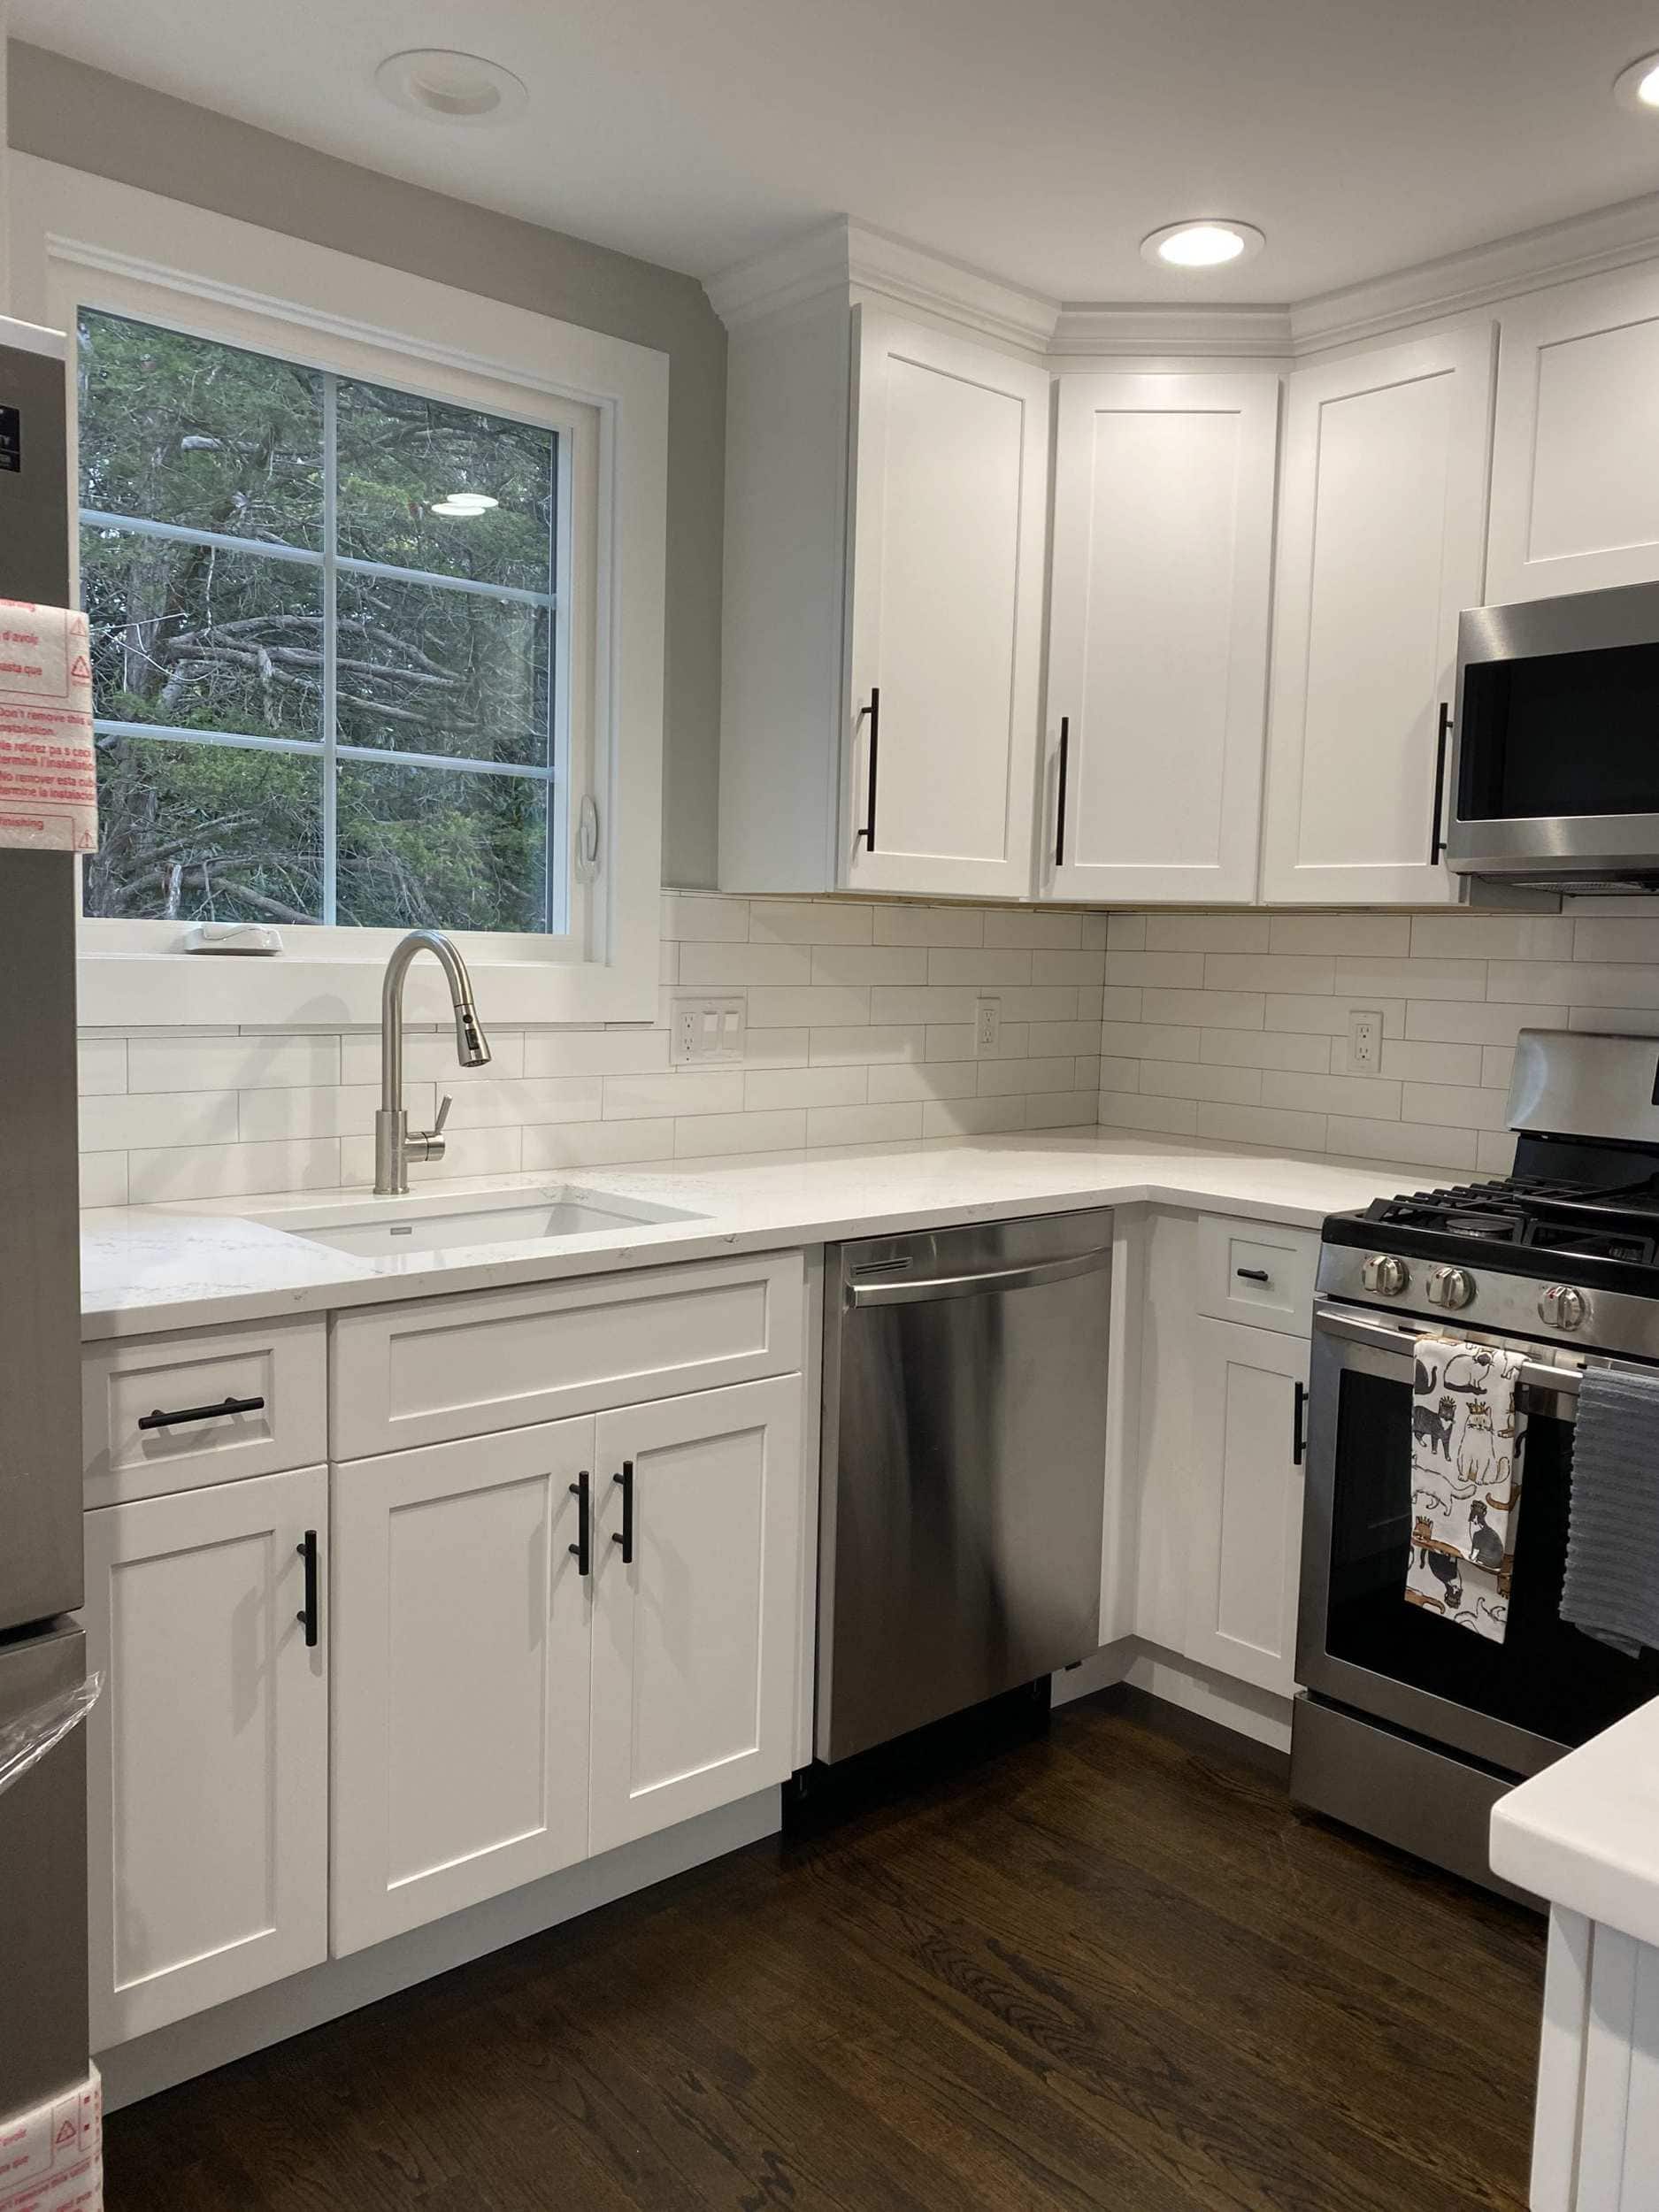
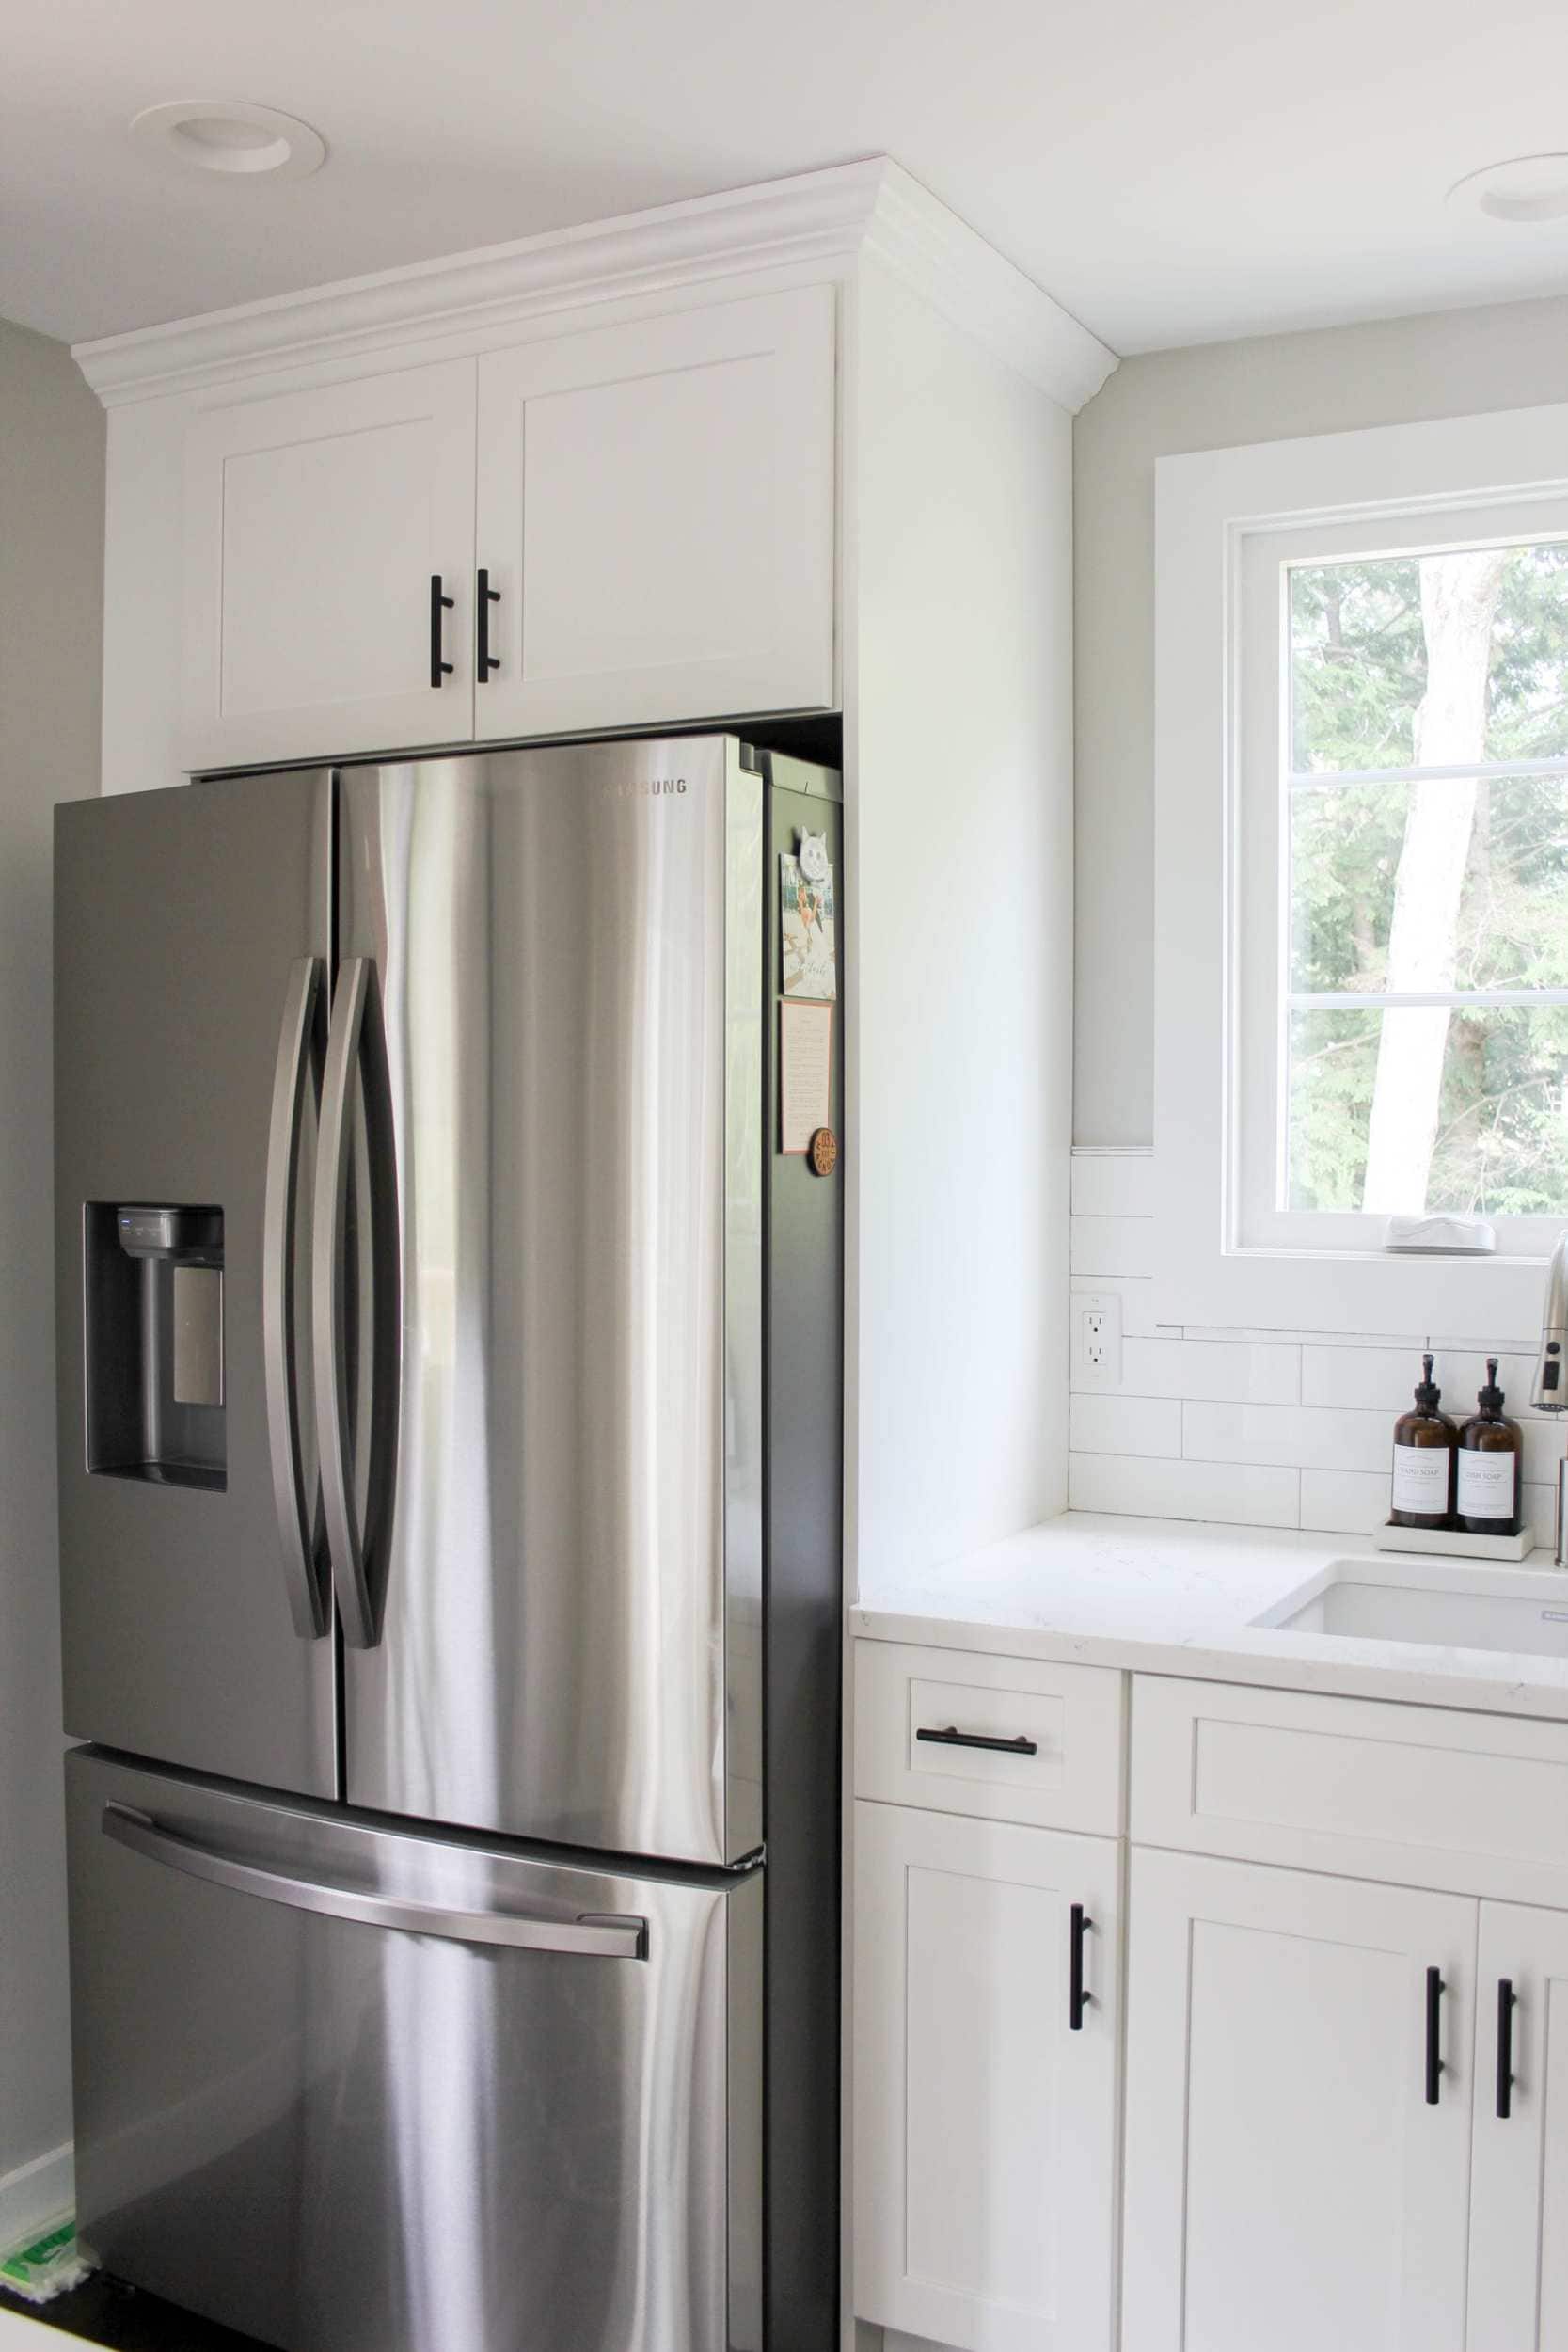
That brings us to move in day and then happily ever after! I love my kitchen even though this renovation was quite extensive. I know some may say it looks sterile but I love how bright and open it is now! I am so thankful I was able to bring the cabinets to the ceiling with the crown molding and so far I am very happy with all the fixtures and appliances I chose.

And there you have it! The whole home renovation took about 6 months to complete and this kitchen is entirely different then it was before.
Shop This Post
- Faucet: WEWE Single Handle High Arc Brushed Nickel Pull Out Kitchen Faucet
- Refrigerator: French Door Refrigerator in Stainless Steel with CoolSelect Pantry
- Stove: Gas Range with Self-Cleaning and Fan Convection Oven in Stainless Steel
- Dishwasher: Built-In Tall Tub Dishwasher with Stainless Steel Interior Door
- Microwave: Samsung Over-the-Range Microwave Stainless Steel
- Pendants: Scolare Vintage Pendant Light | Black Kitchen Island Light
- Long Cabinet Pulls: Probrico 5 Pack|Flat Black Kitchen Cabinet Pulls 7-9/16
- Short Cabinet Pulls: Probrico 12 Pack| 3 Inch Hole to Hole Black Kitchen Cabinet Pulls
- Countertops: Hanstone Quartz Chantilly
- Cabinets: Fabuwood Galaxy Frost Cabinets
- Sink: BLANCO, White 522414 PRECIS SILGRANIT Single Bowl Undermount Kitchen Sink